Now retrieving an image set.
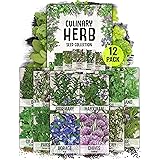
GADI 67-Inch Galvanized Raised Garden Bed, Metal Planter Box for Vegetables and Flowers, Large Outdoor Gardening Kit, Easy DIY Assembly, Weather-Resistant & Rust-Proof
$39.99 (as of 12:59 GMT -05:00 - More infoProduct prices and availability are accurate as of the date/time indicated and are subject to change. Any price and availability information displayed on [relevant Amazon Site(s), as applicable] at the time of purchase will apply to the purchase of this product.)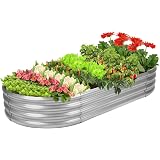
Now retrieving an image set.
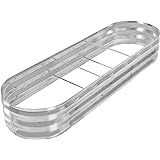
Rakukiri Raised Garden Bed Galvanized Planter Box Outdoor, 5ft Oval Large Rot-Resistant Metal Garden Bed Planter for Vegetables Flower Herb (Silver)
$29.99 (as of 12:59 GMT -05:00 - More infoProduct prices and availability are accurate as of the date/time indicated and are subject to change. Any price and availability information displayed on [relevant Amazon Site(s), as applicable] at the time of purchase will apply to the purchase of this product.)Choosing the Right Location
Evaluating Sunlight
One of the first things I learned about gardening is that location is everything. You want to place your raised beds in an area that gets plenty of sunlight—at least six to eight hours a day. Before I built my first bed, I spent a couple of sunny afternoons just watching how the light shifted across my yard. It’s surprising how trees, fences, and buildings can block sunlight at different times!
Also, keep an eye on how the sunlight interacts with your future plants. Some veggies, like tomatoes and peppers, thrive in full sun, while others, like lettuce and spinach, prefer partial shade. Knowing this ahead of time can save you a lot of headaches later.
Another tip? Avoid low-lying areas. They might look appealing when you’re planning, but they can lead to water pooling and potential flooding. Choose a sloped area if you have one; it actually helps with drainage and sunlight exposure.
Considering Accessibility
When setting up my raised beds, I quickly realized that accessibility plays a huge role in how I manage my garden. I want to be able to easily reach my plants for tending, picking, and watering without stepping into the beds—that compacts the soil and can lead to problems.
I usually leave paths wide enough for a wheelbarrow; trust me, it makes life so much easier when you’re hauling compost or fresh veggies! Make sure to think about how you’ll get to your plants during the rainy season too. You want it to be convenient and safe!
And hey, if you have kids or pets, consider leaving some extra space. They’ll love wandering through the garden without trampling the plants. Accessibility matters for enjoyment as much as it does for maintenance!
Understanding Drainage Needs
Ah, drainage! It took me a couple of years to truly appreciate how crucial it is. Poor drainage can drown your plants faster than you can say “overwatering.” When I selected my garden spot, I dug a small hole to see how fast the water would drain away. If it’s still sitting there after a few hours, you’ve got a potential swamp!
Consider elevating your raised beds a bit to help with drainage. An easy fix is to add a layer of rocks or gravel at the bottom of the bed; it allows excess water to seep away while keeping your soil intact. I’m all for maximizing growth while minimizing waterlogging!
Another tip: the type of soil you use can affect drainage too! Mix in some sand or perlite to your soil. This helps air circulate around the roots and prevents water from sitting too long. Trust me; your veggies will thank you!
Building Your Raised Beds
Selecting Materials
Choosing the right materials for your raised beds is kind of like picking good friends; you want something that will last! I started with untreated cedar because it’s naturally resistant to rot. You can also use recycled materials like bricks or stones if you’re looking for something quirky!
I’ve also seen folks use metal sheets. They look super sleek, but be careful with your plant choices, as metal can heat up quickly in the sun and potentially damage roots. If you go this route, make sure you’re planting heat-tolerant veggies.
Whatever you choose to work with, keep in mind that it should be safe for your food. Avoid using treated woods if possible; the chemicals can leach into the soil over time. Better safe than sorry!
Assembling the Structure
The actual assembly of the raised bed is easier than it sounds. I still remember the day I built mine—it was surprisingly fun! If you’re going for a rectangular shape, measure it out first. I usually use 2×6 boards, but adjust based on how deep you want your bed.
It’s handy to use corner posts to create stability. Just make a hole for each post and secure them with nails. I’ve learned the hard way that a solid structure can save you a lot of trouble from collapsing beds in rainy weather.
When it comes to height, I typically stick to about 12-24 inches. This height allows for good planting depth while still being easy to reach. If you have bad backaches, a higher bed might be more comfortable for you!
Filling with Soil
So, now that you’ve got your structure set up, it’s time to fill it with soil! It’s not just about grabbing any old dirt and dumping it in; you want a good mix. I usually mix two parts topsoil, one part compost, and one part peat moss or coconut coir for aeration.
This blend not only provides nutrients but also improves water retention and drainage. And let me tell you—the difference it makes for the growth of your veggies is night and day!
Don’t forget to fluff up the soil as you layer it in. That helps avoid any compacting. Remember, happy roots make for happy plants, so give them some breathing room!
Planting and Maintaining Your Vegetables
Selecting Your Vegetables
Choosing what to plant can be both thrilling and overwhelming—there are just so many options! I like to start with my favorites: tomatoes, cucumbers, and radishes. They’re relatively easy to grow, and there’s nothing quite like the taste of homegrown produce.
Get a free subscription to PREPARE – with more gardening and homesteading tips!
Consider companion planting too! Some plants thrive better together, while others can stifle growth. For example, growing basil alongside tomatoes can enhance the flavor and helps repel certain pests. It’s a win-win!
Also, pay attention to the planting seasons. Depending on your climate, certain veggies will flourish better in spring, while others are better suited for fall. Always check a planting calendar before diving in.
Watering Techniques
Let’s talk watering! I used to just sprinkle some water on top of my bed and call it good. But real talk: you want to water deeply and less frequently. This encourages roots to go deeper, making your plants more resilient.
I often invest in a soaker hose or drip irrigation system. This helps soak the roots without wasting water or getting the leaves wet, which can lead to disease. Plus, it’s a huge time saver!
Make sure to adjust your watering as the seasons change. In the hot summer months, you might need to water more often, while in cooler weather, you can cut back. A little attention goes a long way!
Dealing with Pests and Diseases
Oh boy, pests can be a gardener’s worst nightmare. I learned quickly that being proactive is key. I often plant marigolds around my vegetable beds—these beauties deter many pests while looking pretty too!
Another thing I do is inspect my plants regularly. If I spot any critters or disease signs early, I can take action before it gets out of hand. Neem oil is a great organic option for treating many common issues.
And don’t forget to keep your garden tidy! Removing dead leaves and debris helps reduce hiding spots for pests and diseases. Maintaining good hygiene in the garden is just as important as your plants’ health.
Enjoying Your Harvest
Timing Your Harvest
After all that hard work, it’s time to enjoy the fruits (or veggies) of your labor! Timing your harvest can be crucial. Each vegetable has a specific time when it’s at its peak flavor and texture.
I’ve learned to get familiar with each plant’s signs of readiness. For instance, tomatoes should have that vibrant color and slight give when you press them gently. On the other hand, cucumbers should be firm yet not overgrown!
It’s also a good idea to regularly check in on your plants. Slightly different growing conditions can change the usual timing, so stay aware of what’s happening in your garden.
Storing and Preserving
Once you’ve harvested your veggies, the next big question is: how to store them? I’ve made the mistake of throwing everything together into one bowl, only to find some veggies spoiled quicker than I’d like! Each veggie has its own best storage method—for instance, keep carrots in cold, humid conditions.
If you’ve got a bumper crop of something like tomatoes, consider canning or making sauces. Not only can you enjoy that freshness through the winter, but it feels pretty rewarding to eat food you grew yourself!
Don’t forget about sharing! Nothing brings people together like fresh vegetables. I often share the surplus with friends and family, and it’s one of the best parts of gardening!
FAQ
1. What materials should I use for my raised beds?
Using untreated woods like cedar or recycled materials like bricks and stones is best. Avoid treated woods to prevent any chemicals leaching into the soil. Choose materials that suit your style while ensuring they are safe for growing food.
2. How deep should my raised beds be?
A depth of 12-24 inches is ideal for most vegetables. This allows for good root growth while remaining manageable for maintenance. Always consider the plants you want to grow and adjust accordingly.
3. Do I need to add special soil to my raised beds?
Yes! A good mix is crucial: I typically use two parts topsoil, one part compost, and one part peat moss or coconut coir. This mix promotes healthy nutrient levels, water retention, and air circulation, which are important for root health.
4. How often should I water my raised beds?
Water deeply and less frequently to encourage deep-root growth. Depending on your climate, you may need to adjust your watering schedule. A soaker hose or drip irrigation system is also an effective way to conserve water and manage moisture levels.
5. What should I do about pests in the garden?
Being proactive is key! Plant companion plants that deter pests, inspect your plants regularly for any signs of trouble, and maintain garden hygiene. Organic options like neem oil can help treat pests without harming your plants.