Now retrieving an image set.
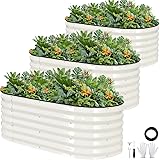
Galvanized Raised Garden Bed Outdoor |17'' Tall Planter Box Outdoor for Deep Root Plants | 3Pcs Raised Bed Kit for Gardening with Rubber Strip for Vegetables Flowers Fruits (White, 4x2x1.4FT)
Now retrieving the price.
(as of 08:25 GMT -05:00 - More infoProduct prices and availability are accurate as of the date/time indicated and are subject to change. Any price and availability information displayed on [relevant Amazon Site(s), as applicable] at the time of purchase will apply to the purchase of this product.)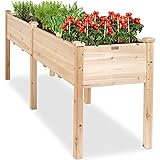
Now retrieving an image set.
Best Choice Products 72x24x30in Raised Garden Bed, Elevated Wood Planter Box Stand for Backyard, Patio, Balcony w/Divider Panel, 6 Legs, 300lb Capacity - Natural
$139.99 (as of 12:59 GMT -05:00 - More infoProduct prices and availability are accurate as of the date/time indicated and are subject to change. Any price and availability information displayed on [relevant Amazon Site(s), as applicable] at the time of purchase will apply to the purchase of this product.)Understanding Soil Composition
What Makes Up Soil?
Soil is a complex mixture of minerals, organic material, air, and water. To put it simply, it’s where all the magic begins! Every garden’s health starts with understanding what’s beneath the surface. Minerals like sand, silt, and clay create the soil structure, while organic matter is crucial for delivering nutrients to plants.
I remember the first time I got into gardening; I had no clue what my soil was like! Did I have clay, sandy soil, or something else? Little did I know how much of a difference understanding soil composition would make for my garden’s growth. Getting familiar with your soil can help you make adjustments to ensure optimal plant health.
Plus, soil composition influences drainage, nutrient availability, and even pH levels. So, figuring out what you’re working with is absolutely essential in achieving a flourishing garden. It’s kind of like knowing the personality of your plants!
Why Soil Testing is Important
Soil testing can be likened to a health check-up for your garden. Just as we monitor our health, our plants need the right conditions to thrive. A soil test will reveal nutrient deficiencies and toxic levels, helping you determine what your garden specifically needs.
Once I started testing my soil, I realized my garden was lacking crucial nutrients. Having this insight allowed me to amend the soil properly, fostering vibrant plant growth and bountiful harvests. It’s all about being proactive and responsive to what your plants need.
In essence, you can’t grow healthy plants if you don’t know what your soil is working with. Embracing soil tests can take your garden from average to awe-inspiring. It’s a game-changer!
How to Collect Soil Samples
Now let’s get into the fun part—collecting soil samples! Start by choosing a representative area of your garden. It’s key to collect samples from different spots to get a good overall understanding of your soil health.
When it comes to digging, I like to use a garden spade or trowel to remove about 6 inches of soil. Be sure to collect samples from at least 5 different spots, mix them together in a clean bucket, and let it dry out a bit before you send it off for testing. Easy peasy!
Don’t fret if you’re unsure about your collection method—I was there once too! Just remember to avoid areas around plants or fertilizer spots to get a clear view of your soil health across the board.
Choosing the Right Testing Method
Home Testing Kits
Home testing kits can be a fantastic first step for testing your soil. These kits are super user-friendly and allow you to grab a good read on basic nutrients and pH levels without breaking the bank. I picked up a kit when I first started my garden journey, and I found it incredibly handy!
Most kits come with instructions, and they usually include tests for nitrogen, phosphorus, potassium, and pH levels. Just imagine doing a little science experiment right in your backyard! It’s really a neat way to feel connected with your soil.
Once you’ve performed your tests, you’re equipped with the knowledge to determine what your plants might need. However, if you need a more in-depth analysis, you might want to look into professional testing services.
Professional Soil Testing Services
If you’d like accurate, detailed results, professional soil testing is the way to go. Many local agricultural extensions or private labs offer this service. You might think it sounds a bit tedious, but I promise, it’s worth it!
When I sent some samples off for professional testing, I received detailed reports on nutrient levels, contaminants, and even recommendations for amendments. It was like having a personal soil chef guiding me on what dishes I should serve my plants!
Moreover, professionals may test for things that home kits don’t, such as heavy metals or other contaminants. If you’re serious about your gardening, investing in this form of testing will provide the most comprehensive insights.
Interpreting Soil Test Results
Once you have your results—be it from a home kit or professional service—it’s time to interpret them. Don’t be put off by any of the numbers and letters you see! At first glance, it may look overwhelming, but I’m here to assure you that it’s manageable.
Get a free subscription to PREPARE – with more gardening and homesteading tips!
Your report will typically include a breakdown of nutrient levels and pH. What you’re really looking for is balance: Are your nitrogen levels high? Is the pH too acidic for your plants? By understanding this data, you can make informed decisions on how to amend your soil.
I often consult local gardening guidelines to see how my test results compare to optimal conditions for my specific plants. This will give you a clear pathway to creating a thriving garden, just as if you were in the driver’s seat of a bright green tractor!
Amending Soil Based on Test Results
Adding Nutrients
Once you’ve deciphered your soil test results, it’s time to add the necessary nutrients. For instance, if nitrogen levels are low, adding compost or well-rotted manure can be a game-changer. It’s fantastic to witness the benefits of nutrient amendments firsthand!
Personally, I like to use organic options to keep my garden eco-friendly. It not only helps my plants grow but also makes me feel good knowing I’m nurturing the environment. Plus, who doesn’t love the smell of good compost? It’s like perfume for my garden!
Don’t be afraid to experiment a bit! Every garden is a unique blend of factors—what works for one may not suit another. Just like each plant has its quirks, so does soil, so take your time to find what works best for you.
Adjusting pH Levels
Now, if your soil report shows that the pH is off, it’s time to adjust it. Many plants prefer a slightly acidic pH, so if your soil is too alkaline, adding elemental sulfur can help lower it. Conversely, if it’s too acidic, lime is your best friend.
I’ve adjusted pH levels in my own garden, and honestly, I was amazed at the quick turnaround. That first time I added lime, I saw a noticeable difference in my plants’ health within just a few weeks! It’s practically instant gratification.
Keep in mind, adjusting pH doesn’t happen overnight! You may need to re-test your soil after a season or so to confirm that your amendments are taking effect. Patience really does pay off in gardening!
Maintaining Soil Health
So, you’ve tested, amended, and nurtured your soil—what’s next? Maintaining soil health is an ongoing process. Incorporating practices like crop rotation, cover cropping, and mulching can keep your soil vibrant long-term.
I often find that the healthier my soil is, the more resilient my plants become against pests and diseases. It’s like my soil becomes their superhero cape, giving them strength in adversity. Plus, who doesn’t love a garden that thrives on its own?
A regular schedule for testing every couple of years can really help you keep tabs. Trust me, staying on top of soil health is well worth the time and effort for a flourishing garden!
Frequently Asked Questions
1. How often should I test my soil?
It’s generally a good idea to test your soil every one to three years, depending on how intensive your gardening practices are. If you’re making lots of amendments or growing various crops, more frequent testing can be beneficial.
2. What do I do if my soil pH is too low or too high?
If your pH is too low, add lime to raise it. If it’s too high, consider adding elemental sulfur. Always follow the recommendations based on your soil test results for the best outcomes.
3. Can I do soil testing in the winter?
Absolutely! You can collect soil samples during winter. However, testing results may vary slightly depending on weather conditions. Whenever you’re ready to take action, just make sure to do your amendments ahead of planting season.
4. Where can I send my soil samples for testing?
Start by checking with your local agricultural extension office, as they often provide soil testing services. Many private labs do this too—just make sure to follow their sampling instructions!
5. What’s the most important factor in soil health?
It’s a combination of nutrients, moisture, aeration, and pH balance. The balance among these factors influences the overall health of your garden, ensuring your plants have the best growing environment possible!