Now retrieving an image set.
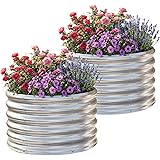
AHEONLAR 2 Pack 2x2x1.5ft Round Galvanized Raised Garden Bed Outdoor Metal Planter Box for Vegetables Steel Raised Beds for Gardening Silver
$44.99 (as of 08:26 GMT -05:00 - More infoProduct prices and availability are accurate as of the date/time indicated and are subject to change. Any price and availability information displayed on [relevant Amazon Site(s), as applicable] at the time of purchase will apply to the purchase of this product.)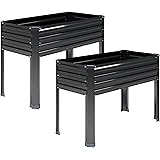
Now retrieving an image set.
DIIYIV 2PCS Galvanized Raised Garden Bed with Legs,2PCS 48×18×30in Elevated Planter Box for Backyard,Garden, Patio, Balcony, 300lb Capacity,Planters for Outdoor Plants,Black
$89.99 (as of 12:59 GMT -05:00 - More infoProduct prices and availability are accurate as of the date/time indicated and are subject to change. Any price and availability information displayed on [relevant Amazon Site(s), as applicable] at the time of purchase will apply to the purchase of this product.)1. Understand Your Soil Type
Why Soil Type Matters
Hey there! Before you do anything, you gotta get up close and personal with your soil. It’s like getting to know a friend. Each type of soil has its own quirks, and trust me, once you figure it out, the rest becomes a lot easier!
We often overlook how vital this step is. Understanding whether your soil is sandy, clayey, or loamy can make a world of difference. For instance, sandy soil drains quickly but doesn’t hold moisture well, while clayey soil retains water but can be a huge pain to work with.
So, grab a handful of that dirt, and feel it! Is it crumbly? Sticky? Knowing this helps you determine what amendments you might need to enhance it naturally. It’s all about creating a solid foundation for your garden!
Testing Your Soil
The next step? Test it! While you can buy fancy kits, a simple DIY can give you great insights. Grab a jar, some water, and shake it up with your soil. Let it settle for a bit, and you’ll see layers forming—each one telling a story about your soil’s properties.
Look for color and layer thickness. Darker, richer layers usually hint at better nutrient content. If you notice a top layer of sand, a middle layer of silt, and then clay… well, that’s a mixture that could need some work! Each layer is a clue.
Plus, testing pH can be super beneficial. You want a slightly acidic to neutral range (around 6.0 to 7.0). If it’s too far off, don’t worry—I’ll cover that in a minute!
Know What Plants Thrive
Not all plants want the same vibe, right? Once you know your soil type, you can choose plants that naturally thrive in it. This is awesome because healthy plants will, in turn, help your soil health! Some plants are like soil heroes—they aerate the ground or fix nitrogen, which gives your garden a boost.
Consider legumes, for instance. They can enrich the soil naturally! So, do a little detective work. What are your favorite plants? Do they gel well with the soil you have? You’d be surprised how some plants can improve soil health without you lifting a finger!
In short, understanding this connection is like making your garden ecosystem work in harmony. Choose wisely, and you’ll see the fruits of your labor—literally!
2. Composting is Key
Starting Your Compost
Now, let’s get down to some good old composting! I absolutely love this part because it’s practical and eco-friendly. Think of composting as giving your soil a hearty meal. You’re turning kitchen scraps and yard waste into nutrient-rich goodness. Who doesn’t love a two-for-one deal?
To start, find a bin or simply create a pile in your backyard. Toss in all those veggie peels, coffee grounds, and dried leaves! Make sure you balance brown (carbon-rich) and green (nitrogen-rich) materials for optimal results.
Don’t overthink it—just start throwing stuff in! With time, nature does its thing, and you’ll have beautiful compost that’s packed with nutrients that your plants will feast on.
Benefits of Composting
Here’s the deal: composting enriches your soil, improves its structure, and helps with water retention—all good things! Plus, it reduces the need for chemical fertilizers, which is exactly what we’re about in this article.
Not only do you end up with great soil, but you’re also reducing waste. Isn’t that a win-win? Your garden flourishes while you’re saving the planet one peel at a time. Feel like a hero yet?
And guess what? Adding compost opens the door to beneficial microorganisms, too! These little guys break down nutrients for your plants and create a thriving ecosystem right underneath your feet. No chemicals, just nature’s magic!
Using Compost Effectively
Once you’ve got that black gold ready, how do you use it? Sprinkle a layer on top of your soil or mix it in when planting. Your plants will love the attention, and you’ll probably notice them growing stronger and healthier in no time!
Remember to rotate your compost. This ensures every part gets the air and moisture it needs to cook nicely. It’s a simple but essential step that can’t be ignored. Flip it every few weeks, and you’ll have rich compost ready before you know it.
Lastly, don’t be shy about experimenting! Each garden is unique, so play around with how much compost you add and watch what your plants prefer. Gardening is as much about learning as it is about growing.
3. Add Natural Amendments
What Are Natural Amendments?
Let’s dive into the world of natural soil amendments. These are substances you add to your soil to enhance its fertility and overall health, and the best part? They come from natural sources! Think of it as a booster shot for your plants.
Common natural amendments include bone meal, fish emulsion, and green manure, among others. They’re packed with nutrients, and trust me, once you start adding them, you’ll feel like you’ve found the secret to gardening success.
Just remember, each amendment has its profile, so read up on them. Some are great for adding nitrogen, while others might focus on phosphorus. Infusing your soil with the right nutrients can take your veggies to the next level!
Choosing the Right Amendments
When incorporating these amendments, consider your soil’s needs first. If you’ve tested your soil (like we discussed), you’ll know what it’s lacking. Match your amendments accordingly. An amendment meant for clay might not be the best choice for sandy soil.
Additionally, be mindful of the timing. Some amendments are better added at the beginning of the growing season, while others can be mixed in mid-season to give your plants extra love as they grow!
Always read the instructions, too—overdoing it can hurt more than help. A little sprinkle goes a long way, so trust your instincts and pay attention to how your plants respond!
Applying Natural Amendments
When applying, take your time to mix amendments well into the soil. You don’t want patches of concentrated nutrients—think of it like seasoning your food! An even distribution will ensure your plants get the goodness evenly.
Get a free subscription to PREPARE – with more gardening and homesteading tips!
You can also apply amendments when planting new seeds. Just give them a solid start! Make sure to water them in well to help with nutrient absorption. Healthy soil means happy plants, and who doesn’t want that?
Lastly, remember to monitor your plants. Observe how they’re reacting. If they’re thriving, great! If they’re not, it might be time to adjust your mix. Gardening is all about adapting as you learn!
4. Incorporate Mulching Strategies
Why Mulch Matters
Let’s chat about mulch! I swear by it. It’s one of those underappreciated heroes of soil health. Mulch, whether organic or inorganic, serves as a protective layer for your soil while retaining moisture and suppressing pesky weeds.
Plus, as it breaks down, organic mulch (like straw or wood chips) actually enriches the soil! It’s like a little continuous gift to your garden. Win again! Honestly, if you haven’t mulched yet, what are you waiting for?
And don’t forget that it keeps your soil temperature more consistent. Plants love a stable environment, and mulch helps them feel comfy, especially during those drastic seasonal changes!
Types of Mulch to Use
I usually prefer organic mulch options, like straw, grass clippings, or shredded leaves. They enrich your soil as they break down, creating that fabulous nutrients cocktail we all want for our plants. There are so many choices—you’ll find something that fits your landscape!
Inorganic options are also available, like landscape fabric or rubber mulch, but they don’t provide those nutrient perks. If you choose these, consider adding organic mulch on top for that nurturing effect!
Every garden is unique, and what works for one might not work for another—so experiment a little. Decide based on aesthetics, functionality, and what you’re growing. Your garden should represent you!
How to Apply Mulch
Applying mulch is pretty darn simple. Just spread it evenly over your soil, making sure it’s a couple inches thick. You want enough coverage to block weeds but not so much that it suffocates your plants!
Also, keep mulch away from your plant stems. It’s like giving your plants a cozy blanket but making sure it doesn’t hug too tightly! You want them to breathe as they grow.
Lastly, when your mulch starts looking a bit sad or breaking down, give it a refresh! Just lift old mulch a bit and add new. Continuous care will turn your garden into the lush paradise you’re dreaming of.
5. Practice Crop Rotation
What is Crop Rotation?
Let’s wrap this up with a fundamental technique: crop rotation! This is where you change what you’re growing in specific areas of your garden every season. Doing this helps break cycles of pests and diseases, while also managing soil nutrients more effectively!
Imagine growing tomatoes in the same spot every year. After a while, the soil becomes depleted. Switching things up allows specific nutrients to recover. Just like you wouldn’t eat the same thing every day, why put your soil through that?
It’s as much about variety as it is about timing. Each crop has different nutrient needs and impacts on the soil, so rotating them helps balance everything out. Simple yet so effective!
How to Implement Crop Rotation
To start, group plants by their nutrient needs; for example, legumes (like peas) are great for fixing nitrogen in the soil. Follow them with heavy feeders like tomatoes. This way, each plant gives and takes what it needs!
Another tip is to plan your garden layout ahead of time. Writing it all out can help you visualize where to plant what. Maybe even create a little chart to reference each year! I’ve got one hanging in my shed—it helps keep me organized.
And don’t forget to mix in cover crops during off-seasons! They can significantly enhance soil health between your rotations. Building organic matter while keeping the soil covered and protected is a savvy move!
Monitoring the Results
Once you begin crop rotation, keep an eye on the results. Are your plants thriving? Make notes! Over time, you’ll start to see patterns. Maybe certain rotations yield more than others, or specific plants do better in certain spots.
Adjust as needed—gardening is all about flexibility. Things change from year to year, and being adaptive will help your garden flourish. Learn from each cycle, and you’ll be a pro in no time!
And remember, if a certain rotation doesn’t work out, don’t be discouraged. Every gardener faces challenges. Just take it as a learning experience and look ahead to next year!
Frequently Asked Questions
1. Can I really improve my soil without chemicals?
Absolutely! There are tons of natural methods, like composting, using organic amendments, and practicing crop rotation. Your garden can thrive using nature’s gifts!
2. How long does composting take?
It typically takes anywhere from a few weeks to several months, depending on factors like temperature, moisture, and what you’re composting. But it’s worth the wait!
3. What’s the best way to test my soil?
You can do a DIY test using a jar of water and soil, or use a commercial soil testing kit for more detailed results. Both help you understand what your soil needs!
4. How often should I rotate crops?
A good rule of thumb is to rotate your crops every growing season. This keeps pests and diseases at bay while allowing nutrients to replenish in your soil.
5. Is mulching necessary?
Mulching isn’t strictly necessary, but it offers several benefits like weed suppression and moisture retention. It truly enhances the overall health of your garden!
Get a free subscription to PREPARE – with more gardening and homesteading tips!
Related Content
- Flood of complaints about state’s Roma Street Parkland upgrade
- What is Worm Farming and How Can it Help my Gardening?
- Mandatory Food Composting Mandate Goes Into Effect in California in January – Silver Screen Beat
- 10 Effective garden planning ideas to Transform Your Yard in 2025
- Circularity in Action: The Home Depot’s Commitment to Composting and Sustainability