


LINEX Galvanized Raised Garden Bed 4x2x1 ft, Metal Raised Garden Beds Outdoor Planter Boxes Clearance for Gardening Vegetables Flowers Herbs Above Ground
$35.99 (as of 17:26 GMT -05:00 - More infoProduct prices and availability are accurate as of the date/time indicated and are subject to change. Any price and availability information displayed on [relevant Amazon Site(s), as applicable] at the time of purchase will apply to the purchase of this product.)


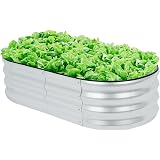
Best Choice Products Raised Garden Bed 48x24x32-inch Mobile Elevated Wood Planter w/Lockable Wheels, Storage Shelf, Protective Liner - Natural
$129.99 (as of 16:34 GMT -05:00 - More infoProduct prices and availability are accurate as of the date/time indicated and are subject to change. Any price and availability information displayed on [relevant Amazon Site(s), as applicable] at the time of purchase will apply to the purchase of this product.)1. Assess Your Garden Bed Location
Evaluate Sunlight Exposure
Before diving in, I take a good look at my garden’s layout. Where does the sunlight hit? I’ve learned the hard way that certain plants need full sun while others thrive in partial shade. By tracking sun patterns over a few days, I can get a solid idea of what my plants will need!
It’s critical to jot down notes on which areas of my garden are bathed in sunlight the longest. That way, I can categorize plants based on their needs. Nothing worse than planting tomatoes in the shadow of a big ol’ tree!
If you’re really committed, consider setting up a simple sun chart or just using your phone to take notes. The goal is to maximize every inch of your garden bed for a bountiful harvest come summer.
Check Drainage Conditions
Poor drainage can be a nightmare for a gardener. Over time, I’ve discovered that digging a small hole in my garden beds and filling it with water can reveal a lot. It’s like a mini science experiment!
After an hour, if the water hasn’t drained away, then I know I’ve got a drainage issue on my hands. It might be time to raise my beds or add some organic matter to improve the soil’s permeability. I’ve found that compost works wonders for this.
Good drainage not only helps prevent root rot but also keeps the soil aerated, allowing my plants to thrive. So a little effort here goes a long way!
Survey Soil Quality
This is where I get my hands dirty—literally! I dig into the soil to check its texture and composition. Is it sandy, loamy, or clay-heavy? Each has its pros and cons!
I often do a simple squeeze test. If the soil holds together but crumbles easily, I’m in business. If it’s rock hard or sticky like mud, that tells me I need to amend it before planting.
Amending soil with compost and organic matter not only enriches it but also helps it retain moisture, which is essential for my garden health. The happier the soil, the happier my plants!
2. Clear Out Debris
Remove Old Plants and Weeds
As winter winds down, I know it’s time to clean up. I’ve made it a ritual to pull out any dead plants or weeds that have taken over my garden beds. It’s kind of therapeutic—and a great workout!
I always make sure to dig out the roots of those pesky weeds. If I leave them in the soil, they’ll come back next season, and trust me, I don’t want that. It’s like gardening arch-nemesis!
Once I’ve cleared the debris, I give the area a good raking to prep the bed for fresh soil. A clean slate is always more inviting, don’t you think?
Add Nutrient-Rich Compost
This step really gets me excited! Nothing beats adding some nutrient-rich compost to my garden beds. I get mine from a local source, and it’s like giving my plants a power-up.
I spread a layer of compost on top of the soil, typically about 2-3 inches thick, and then I mix it in. It’s like making a giant salad for my plants—delicious and nutritious!
This layer not only boosts nutrients but also helps with moisture retention, making it easier for my plants to soak up what they need as they grow.
Loosen the Soil
I’ve learned that compacted soil is never my friend. So, I take my trusty garden fork or tiller and loosen things up. It’s important to aerate the soil, allowing roots to dig down and plants to thrive.
Then, like a bonus, I get to mix in all that compost I just laid down, which makes for the perfect concoction for my budding plants. It’s like giving them a hug from the inside!
If you don’t have a tiller, no biggie—hand tools work just as well! The goal is to ensure the soil is fluffy and ready to support the growth that’s about to happen.
3. Create Planting Layouts
Plan Companion Planting
Companion planting is like a matchmaking service for my garden. Some plants thrive when they’re close together, while others? Not so much. I love researching the best combos—like tomatoes and basil, which enhance each other’s flavor!
By sketching out my garden layout, I can visualize the best placements. It’s a mix of art and science, and I get to be creative! I recommend looking up online resources or gardening books for companion planting charts to help with this process.
Once I have my layout, I can’t wait to get my hands on the seeds and start planting. It’s like planning a dinner party where I know everyone will get along!
Space Plants Properly
Spacing is crucial in gardening. There’s nothing worse than crowded plants fighting for sunlight and nutrients. I take care to follow spacing recommendations from seed packets or gardening resources to ensure healthy growth.
Generally, I like to leave enough room for plants to spread without stepping on each other’s toes. This also means I can move around my garden easily to weed or harvest later. Win-win!
Get a free subscription to PREPARE – with more gardening and homesteading tips!
If space is tight, I sometimes look to vertical gardening options—like climbing beans or trellising cucumbers. It’s a clever way to maximize my garden’s potential!
Mark Your Space
After laying out my garden, I always take the time to mark my spaces. I use garden markers or simply some recycled materials to keep things organized. I find that it gives my garden a nice, tidy look, and it helps me remember where each plant goes when I’m ready to plant.
Plus, marking my spaces helps avoid any mix-ups while I’m planting. Forgetting where I placed my favorite herbs can be a total bummer, and I’ve learned to avoid that disaster!
Organization is key, and it makes me feel like a gardening pro every spring as I look over my marked plots of land, ready for action!
4. Select Appropriate Plants
Choose According to Your Zone
Understanding my gardening zone has been a game changer! I remember when I planted things that just weren’t suited for my climate. It felt like I was setting myself up for failure. Now, I check my zone and only select plants that will thrive.
Plant catalogs and local nurseries often have zoning tips, and it’s important to pay attention to them. By picking the right plants for my area, I’m setting myself up for a fantastic garden season!
This also means considering seasonal changes. I’ve learned which plants thrive in spring versus those that are summer staples—timing is everything!
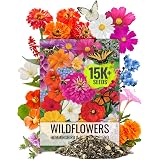
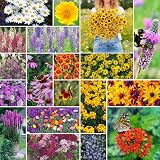
Try New Variety
Every year, I try to shake things up by adding at least one new variety of plant. It keeps my garden exciting! Plus, you never know what gem you’re going to find. I once added a rare heirloom tomato that blew my mind with its flavor!
Exploring local farmers’ markets or specialty nurseries has opened up a whole new world. I love hearing the stories behind these unique plants and how they might do in my garden!
Plus, trying new varieties means I can potentially discover new favorites. Each year can feel like an adventure in my backyard!
Consider Plant Maintenance
Some plants require a lot of care, while others are more low-maintenance. I’ve learned the hard way that if I don’t have the time to dedicate to a plant, I probably shouldn’t be putting it in my garden.
Talking with gardening friends and reading up on plant care can help me make the right choices. It’s worth it to invest in plants that can thrive on a little TLC or even stand on their own!
The last thing I want is to feel overwhelmed during the busy growing season. Planning equals peace of mind and lots of happy plants!
5. Prepare for Planting
Gather Necessary Tools
Prepping my garden for planting is all about having the right tools on hand. I like to run through my gardening checklist before a planting day—trowels, gloves, watering can, you name it!
Having my tools ready means I can dive right in without fumbling around. Plus, I like to keep everything in one spot—it’s like my gardening headquarters!
If you’re missing a tool, consider swapping with a friend or borrowing from a neighbor. Gardening is all about community, after all!
Check Weather Conditions
I always keep an eye on the weather forecast leading up to my planting day. I’ve been burned by planting too early when there’s still a frost threat, and I don’t recommend it!
Knowing the right time to plant in relation to the weather will keep me ahead of the game. I even have a gardening app that gives me alerts for potential frost or heatwaves. Technology is my best friend here!
And if the forecast looks iffy, I can always cover young plants with cloth or move potted ones indoors just in case. Better safe than sorry!
Water the Soil
Finally, I always make sure to give my garden beds a good watering before I start planting. It helps the soil settle, and it’s just kind of nice to see everything ready to go! Plus, it gives me an idea of how well my soil retains moisture.
After watering, I let the soil absorb it for a little while before digging in. It’s essential to create that perfect environment for seed germination and root development.
I’m buzzing with excitement as I think about my gardens starting to grow and flourish. The spring planting ritual is always a thrill, and I can’t wait to celebrate my harvest later!
FAQ
- What is the best time of year to prepare garden beds?
- The best time to prepare garden beds is in early spring, once the frost has melted and the soil is workable. This varies by location but generally falls between late March and early April.
- How deep should I loosen my soil?
- Loosening your soil to about 12 inches deep is a good rule of thumb. This allows plant roots to stretch out and breathe, ensuring healthy growth.
- What types of compost should I use?
- Using a mixture of well-aged compost, leaf mold, and aged manure usually results in a nutrient-rich option. Just make sure there are no harmful pathogens!
- Can I plant during a rainstorm?
- Planting during a light drizzle is okay, but during heavy rain, it’s best to hold off. Excessive water can wash the soil away and can lead to poor seed germination.
- What are some good companion plants for tomatoes?
- Tomatoes thrive alongside basil, marigolds, and garlic. Avoid planting them near potatoes and corn, as these can stunt their growth.