Now retrieving an image set.
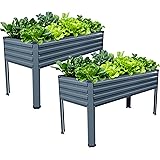
Vengarus Galvanized Raised Garden Bed Outdoor with Legs,48×18×30in Metal Elevated Raised Planter Box for Backyard, Patio, Balcony, 300lb Capacity,Grey(2PCS)
$79.99 (as of 08:26 GMT -05:00 - More infoProduct prices and availability are accurate as of the date/time indicated and are subject to change. Any price and availability information displayed on [relevant Amazon Site(s), as applicable] at the time of purchase will apply to the purchase of this product.)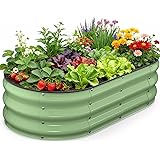
Now retrieving an image set.
Yumatum Raised Garden Bed 4×2×1 FT, Galvanized Metal Raised Planter Box, Vegetable Planting Container with Safety Edge Trim, Hardware & Gloves Included, Fruit Green for Backyard Patio Balcony
$23.99 (as of 08:26 GMT -05:00 - More infoProduct prices and availability are accurate as of the date/time indicated and are subject to change. Any price and availability information displayed on [relevant Amazon Site(s), as applicable] at the time of purchase will apply to the purchase of this product.)Drying Your Harvest
Understanding the Drying Process
Hey there! If you’ve got a garden and are looking to keep your veggies and fruits around for a while, drying is your best friend. The basic idea here is simple: remove the moisture so that bacteria and mold don’t stand a chance. I mean, who wants to toss out a perfectly good tomato just because it got a little fuzzy?
In my experience, the sun is a great drying friend if the weather’s nice. Just keep an eye on those hot days. You want to make sure you’re not simply cooking your produce but actually drying it. There’s a method to this mad science, so check out the optimal temperature ranges and humidity levels. Doing some homework on this will pay off big time.
If the sun isn’t a reliable buddy, you can also rely on a food dehydrator or your oven. Just set it to low and keep the door cracked to let out steam. Make that house smell divine while you preserve! It’s as simple as that, yet so satisfying!
Freezing for Freshness
Getting Started with Freezing
Now, let’s talk about freezing—so easy, right? You can preserve almost anything in your fridge by tossing it in the freezer. I mean, who doesn’t love pulling out that sweet corn in the middle of winter? It’s like a little burst of summer!
The key here is to properly wash, prep, and cut your produce. I usually blanch my veggies for a few minutes beforehand. This helps maintain that vibrant color and crunchy texture. Plus, it makes sure they keep a lot of their nutrients. Seriously, it’s a small step that makes a big difference later!
When you’re packing them away, use good-quality freezer bags or containers, and remember to suck as much air out as possible. I find that labeling them with dates helps me keep track of what I’ve got going on and when it needs to be used. No freezer-burnt greens on my watch!
Fermenting for Flavor
The Art of Fermentation
Alright, let’s get a little tangy! Fermentation isn’t just for craft brewers anymore. You can easily preserve your harvest with this method, and it adds a whole lot of flavor to your dishes. Plus, it’s good for your gut health—win-win!
Start with veggies that are already ferment-friendly, like cucumbers, cabbage, and carrots. The process usually involves packing your veggies with saltwater and letting nature do its thing. Make sure you use a clean jar and keep everything submerged so that nasty bacteria don’t spoil the party.
My favorite part? Just let it sit for a few days to a couple of weeks, depending on the type of veggie you’re using. Taste it along the way until it hits that perfect flavor you’re looking for. It’s amazing how much depth this method brings to your meals!
Creating Jams and Jellies
Simple Techniques for Homemade Jams
Now, who doesn’t love a good jam or jelly? They say the best things come in jars, and I couldn’t agree more. Making jam at home isn’t just about enjoying sweet spreads; it’s a great way to preserve that fruit before it goes mushy.
Get a free subscription to PREPARE – with more gardening and homesteading tips!
Surprisingly, making jam doesn’t require fancy equipment. Just grab your ripe fruit, sugar, and pectin, and you’re almost there! The initial prep can take some time, but once you get that fruity mash bubbling away on the stove, your kitchen will be filled with a smell that’s pure heaven.
Remember to sterilize your jars and lids before you pour in your jam. I like to wait for it to cool down before sealing, ensuring everything’s safe and sound. Plus, who doesn’t love the satisfaction of popping open a homemade jar in the middle of winter? It feels like summer all over again!
Pickling for Preservation
Getting A Grip on Pickling
Last but not least, let’s dig into pickling! This is another method that’s super fun and can jazz up your meals. I mean, who doesn’t love a good pickle on their burger or side of tangy veggies on a charcuterie board? Pickling can give that extra zing to your favorite recipes!
To get started, you’ll need some vinegar, water, and your choice of spices. The best part? You can create all sorts of flavors! Dill pickles, spicy carrots, or even sweet bread and butter pickles—choose your own adventure! Just chop your veggies, make a brine, and pour it all over.
Let them soak up the flavors for a few days in the fridge, and bam! You’ve got yourself some delicious pickles to enjoy. Just make sure to keep your jars clean and stored well, and they’ll last quite a while. Once you crack those bad boys open, get ready for compliments all around!
Frequently Asked Questions
1. Can I dry any type of fruit or vegetable?
Most fruits and vegetables can be dried, but some, like high-water-content ones (think watermelon), might not turn out well. Stick to those that have lower moisture content.
2. How long can I freeze my produce?
Typically, you can freeze produce for about 6 to 12 months, depending on what it is. Just keep an eye on those dates and plan to use them up!
3. Is fermented food safe to eat?
Absolutely! As long as you follow a reliable recipe and keep it in proper conditions, you’re good to go. Fermented foods can actually be really great for your digestive health!
4. How do I know when my jam is ready?
Jam is ready when it thickens and holds its shape on a spoon. Don’t rush through this step; it takes some time to get just right!
5. What’s the difference between pickling and fermenting?
Great question! Pickling involves brining food in vinegar, while fermenting uses beneficial bacteria to preserve and develop flavor. Both methods are fantastic, but they yield different tastes!
Get a free subscription to PREPARE – with more gardening and homesteading tips!
Related Content
- Cornelius told to comply with compost clean up or face jail
- A closer look at composting on National Compost Day
- Council subsidy for compost and worm farms – Riverine Herald
- Composting Holiday Greens – At Your Service – Seattle Public Utilities
- Have food waste? Let worms create compost for you in this indoor habitat