
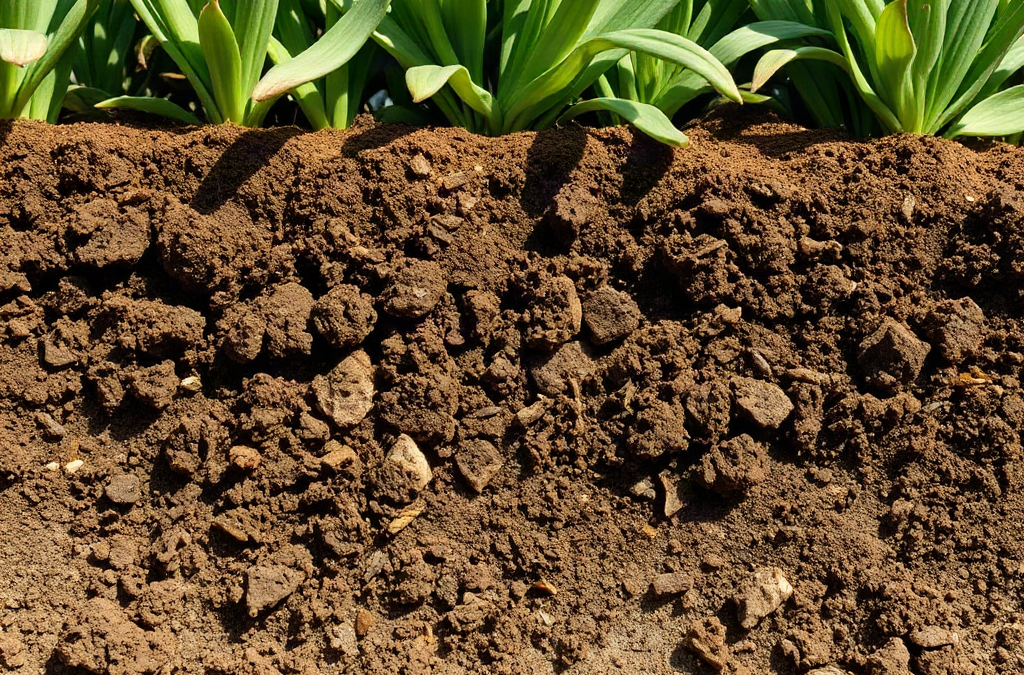
If your garden soil is too sandy, incorporate mature compost into the upper root zone, cover the surface with mulch, and water slowly enough to wet the roots without letting moisture rush below them. Sandy soil has large pore spaces, so it drains quickly and retains fewer nutrients than soil containing more organic matter and fine mineral particles. Apply nutrients in modest, targeted amounts rather than one heavy dose, which is more vulnerable to leaching. Repeat compost applications between growing seasons, monitor moisture below the surface, and use raised beds or imported topsoil only where faster, more controlled improvement justifies the added cost.
Confirm That Sandy Texture Is the Main Problem
Sandy soil should be identified by its behavior as well as its gritty feel. It commonly dries soon after irrigation, falls apart when squeezed, and allows water to disappear from the surface with little puddling. Plants may wilt quickly on warm days even when they were watered recently. Nutrient-related symptoms can also appear because dissolved nitrogen and potassium move through the root zone more readily than they do in soils with greater clay or organic-matter content.
A quick hand test provides useful context. Moisten a sample taken several inches below the surface, squeeze it, and try to form a short ribbon between your thumb and forefinger. Predominantly sandy soil feels gritty and will not hold a ribbon. Perform the test in several locations because a garden can contain an amended planting pocket, sandy subsoil, and a more balanced strip within a few feet of one another. A laboratory soil test is the better choice when plant growth remains poor, since it can identify pH and nutrient issues that texture alone cannot explain.
Fast drainage is not automatically a defect. Carrots, lavender, rosemary, and many plants vulnerable to wet roots can perform well in freely draining ground when water and fertility are managed appropriately. Trouble begins when the soil cannot keep enough moisture and nutrients in the active root zone between routine care. If seedlings collapse during a single dry afternoon or vegetables need frequent watering yet remain pale, improvement is justified. If established drought-tolerant plants are healthy, changing the entire site may create unnecessary work or even reduce the drainage they prefer.
Check for water repellency before blaming texture alone. Very dry soil sometimes sheds water, causing irrigation to run sideways or penetrate through isolated channels. Dig immediately after watering. A wet surface over dry soil indicates that the application was too brief, while narrow wet columns surrounded by dry ground suggest uneven infiltration. Compaction can also occur beneath a loose-looking sandy surface, especially where construction equipment or repeated foot traffic compressed the subsoil.
The practical decision is whether to improve the existing soil, adapt planting choices, or create a contained growing area. Broad ornamental landscapes are usually best improved gradually and planted with species suited to drainage. Intensively cultivated vegetable beds justify more compost and closer irrigation control. A raised bed can solve a small, high-value growing area quickly, but it costs more and does not repair the surrounding ground. This site-by-site diagnosis should come before following any general advice about what to do if your garden’s soil is too sandy.
Build Water and Nutrient Holding Capacity
Mature compost is the most practical amendment for improving excessively sandy ground. Its decomposed organic material increases the soil’s ability to retain moisture and plant nutrients while preserving useful drainage. For a new bed, spread roughly 2 to 3 inches over the surface and blend it into the upper 6 to 8 inches, where most annual vegetable and flower roots will develop. For an established bed, apply a thinner layer around plants and let earthworms, roots, and normal cultivation incorporate it gradually.
Use finished compost that smells earthy and no longer heats after turning. Partly decomposed wood chips, sawdust, or fresh bark should not be mixed deeply into a planting bed as a quick substitute. Carbon-rich material decomposing underground can temporarily compete with plants for available nitrogen. Those coarse materials are more useful on the surface, where they reduce evaporation and break down slowly without disrupting the entire root zone.
A 2- to 3-inch mulch layer provides immediate protection while long-term soil improvement develops. Shredded leaves, clean straw, aged bark, or wood chips reduce direct sun and wind exposure, soften the impact of irrigation, and slow surface drying. Keep mulch a few inches away from stems and tree trunks to avoid persistently damp crowns. Fine compost used alone as surface mulch can crust or dry rapidly; placing a coarser mulch over amended soil generally gives more durable moisture control.
Imported topsoil is useful only when its quality is known. Products labeled “topsoil” vary widely and may contain mostly sand, dense clay clods, weed seeds, or poorly decomposed organic debris. Examine the material before buying a large delivery and ask whether a soil analysis is available. Mixing a modest amount of verified loam with existing sand can add fine mineral particles, but laying a thin, sharply different layer on top may create an abrupt boundary that affects water movement and root growth.
Clay is sometimes promoted as a permanent cure, but incorporating raw clay evenly into sand is difficult. Concentrated pockets can become hard lumps rather than producing a uniform loam. Compost is more forgiving for home gardeners and can be renewed without specialized mixing equipment. Biochar may persist longer, but it should be charged or blended with compost before use and is not a replacement for organic matter, irrigation management, or soil testing.
Progress is cumulative rather than instant. Organic matter decomposes, especially in warm, cultivated beds, so smaller recurring applications are generally more reliable than one extreme amendment. Avoid filling a planting hole with rich compost while leaving the surrounding sand untouched; roots may remain concentrated in the pocket, and moisture behavior can differ sharply at its edge. Amend the broader bed whenever possible.
Adjust Watering and Fertilizing Practices
Sandy beds need irrigation that matches root depth rather than a fixed calendar. Water applied too quickly may pass beneath shallow roots, while frequent surface sprinkling encourages roots to remain near the hottest, driest layer. Apply water at a moderate rate, pause if runoff appears, and inspect the soil afterward with a trowel. The wetted zone should extend through the current root area rather than stopping at the mulch or racing far below it.
Young transplants and germinating seeds require more frequent attention because their roots occupy only the upper few inches. An established tomato or perennial can draw from a deeper volume and should usually receive a more thorough application with time between waterings. Drip tubing or soaker hoses can deliver water close to plants with less leaf wetting, but emitter placement matters. One emitter beside a large plant may produce a narrow wet column instead of moistening the expanding root zone, so reposition or add emitters as plants grow.
Use touch and plant response together. Check beneath the mulch rather than judging by its dry upper surface. Soil that feels slightly cool and holds together weakly may still contain usable moisture; pale, hot, free-flowing sand at root depth needs water. Persistent wilting that improves overnight can indicate daytime demand exceeding uptake, whereas wilting in already wet soil may point to root damage rather than drought. More water is not the correct response to every wilted leaf.
Fertilizer also needs tighter control. Large soluble applications are easily moved below the roots by heavy rain or irrigation. Base major corrections on a soil test, then divide needed fertilizer into smaller applications during active growth. Compost contributes nutrients gradually, but it does not guarantee that nitrogen, phosphorus, potassium, and pH are balanced. Adding more compost or fertilizer without testing can create excessive phosphorus or salts while leaving another limitation unresolved.
Slow-release products may reduce the sharp nutrient surge associated with highly soluble fertilizers, although release still varies with temperature, moisture, and product formulation. For container-like raised beds or demanding vegetable crops, modest supplemental feeding can be appropriate. Drought-tolerant ornamentals in sandy native soil may need little fertilizer and can grow weak, floppy stems if overfed.
A compact monitoring routine keeps adjustments evidence-based:
- Before watering: Check moisture several inches down in two or more places.
- After watering: Confirm the depth and width of the wetted area.
- During growth: Watch new leaves, stem extension, and flowering rather than reacting to one damaged leaf.
- After heavy rain: Reassess nutrient needs instead of automatically repeating the last dose.
The approach is working when the bed remains evenly moist longer, plants recover normally after hot periods, and new growth has appropriate color without excessive softness. Constantly soggy pockets, algae on the surface, rank growth, or continuing nutrient symptoms indicate that the watering rate, amendment amount, or diagnosis needs revision.
Use a Practical Repair Plan for Beds and Borders
Repair should match the growing area, season, and budget. For an empty annual bed, remove perennial weeds, spread finished compost, incorporate it into the active root zone, and rake the bed level. Water once to settle the amended soil, then check whether it drains uniformly before planting. Add surface mulch after seedlings are established or around transplants immediately, leaving their stems clear.
An occupied perennial border requires less disturbance. Do not dig aggressively through established roots. Top-dress with about an inch of compost, cover it with an appropriate organic mulch, and water over a wider area than the original planting hole. Repeat modest top-dressing between growing seasons. This slower method protects roots and soil structure, although visible change takes longer than rebuilding an empty bed.
For a vegetable gardener facing very deep sand, concentrating resources often gives the best return. Improving two permanent beds thoroughly is more manageable than spreading a small amount of compost across a large plot. Paths can remain largely unamended, while planting rows receive organic matter, drip irrigation, and mulch. Raised beds are worth considering where the native sand is extremely drought-prone or where imported soil can be sourced reliably. They still require irrigation and periodic compost because raised mixes also settle and lose organic matter.
Seasonal timing affects results. Autumn is convenient for spreading compost over cleared beds and applying shredded leaves as cover. Spring amendment works when the compost is fully mature and the soil is workable, but avoid repeated deep tilling after the first incorporation. Excess cultivation accelerates organic-matter breakdown, disrupts fungal networks, and leaves loose soil more exposed to wind. During summer, prioritize mulch, irrigation checks, and light top-dressing rather than digging around productive roots.
Set expectations around measurable changes rather than trying to transform sand into heavy loam in one weekend. After amendment, note how long the root zone stays moist, how much irrigation is required during comparable weather, and whether fertilizer symptoms recur. Keep a simple record of compost depth and application dates. If water still vanishes rapidly after repeated improvement, inspect deeper layers and irrigation coverage; the amendment may be too shallow, or the water may be moving through preferential channels.
Avoid adding an enormous volume of organic material at once. Beds dominated by compost can shrink substantially, hold excessive nutrients, and behave more like potting media than mineral soil. A balanced repair retains the drainage advantage of sand while increasing its capacity to buffer moisture and fertility. For ongoing maintenance, revisit what to do if your garden’s soil is too sandy as a recurring soil-care process rather than a one-time correction.
Frequently Asked Questions
Can I put topsoil directly over sandy garden soil?
Yes, but blend verified, good-quality topsoil into the upper root zone rather than leaving a thin, abrupt layer. Test or inspect bulk material first because products sold as topsoil vary considerably.
How much compost should I add to sandy soil?
For a new bed, a 2- to 3-inch layer incorporated into the upper 6 to 8 inches is a practical starting point. Established beds are better treated with thinner annual top-dressings.
Should sandy soil be watered every day?
Not automatically. Seedlings may need frequent moisture, but established plants benefit from watering based on conditions several inches below the surface and the depth of their roots.
Is manure suitable for improving sandy ground?
Well-composted manure can add organic matter, but its nutrient and salt levels vary. Avoid fresh manure near growing plants and use a soil test to prevent excessive nutrient buildup.
Will adding clay turn sandy soil into loam?
Not reliably in a home garden. Clay is difficult to distribute uniformly and may form dense lumps, while finished compost is easier to apply and improves moisture management with less risk.
Conclusion
Treat excessively sandy ground as a long-term management issue, not a reason to replace every inch of soil. First verify the texture and irrigation pattern, then concentrate finished compost where roots actually grow and protect the surface with mulch. Match watering depth to plant maturity, divide fertilizer into restrained applications, and use soil-test results when symptoms persist. Empty vegetable beds can be amended more intensively, while established borders should improve through gentle top-dressing. Raised beds offer faster control in a limited area but bring added material costs and continuing maintenance. Check moisture below the surface and record how the bed responds across a season; longer moisture retention, steadier growth, and fewer recurring deficiencies show that the repair is moving in the right direction.


