
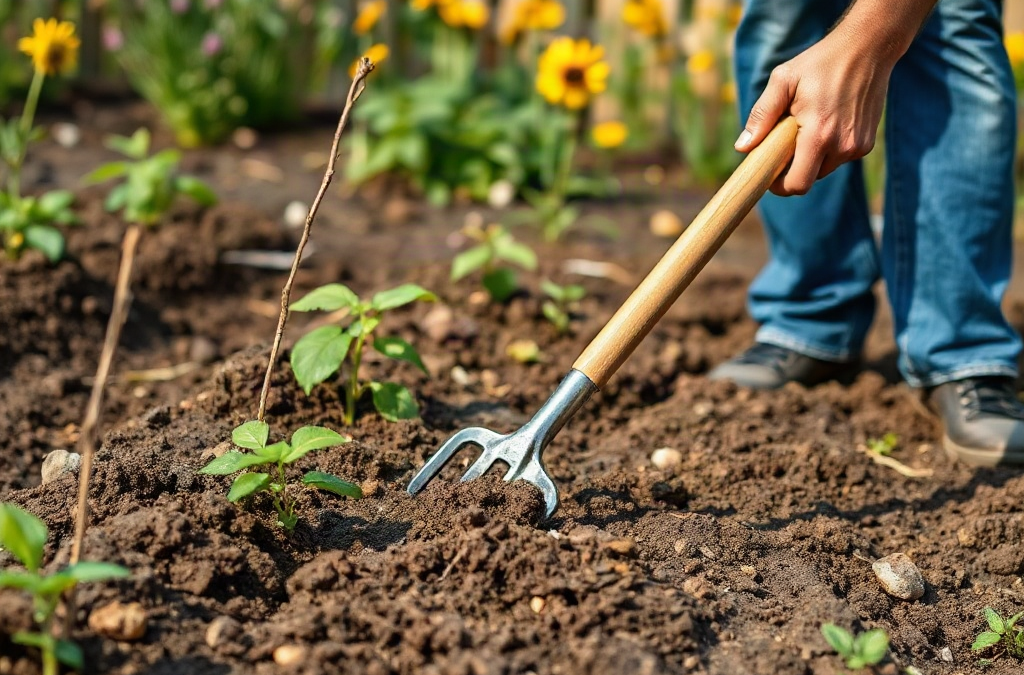
Hand-tilling a garden when machinery is unavailable works best by loosening suitably moist soil in small sections with a digging fork, removing persistent roots, and refining only the planting layer with a hoe or rake. Test moisture first: a squeezed handful should crumble when pressed rather than smear or remain a hard clod. Work backward from one edge so you do not compact loosened ground, and limit cultivation to the depth needed for the intended crop. Compost can be spread before the final shallow pass, but repeated deep turning may damage soil structure, bring buried weed seeds upward, and make a large plot unnecessarily exhausting.
Choose Tools According to Soil and Bed Condition
A digging fork is usually the most effective primary tool for established ground because its tines enter soil with less resistance than a solid spade blade. Push the fork in vertically, pull the handle back enough to lift and fracture the soil, and then withdraw it without fully inverting every slice. This loosens the root zone while preserving more of the bed’s natural layers than repeated shovel turning.
A spade still has a useful role. It cuts clean bed edges, divides sod, and severs roots that bend around fork tines. In compacted clay or ground covered by turf, remove or undercut the sod first and use the spade to open a narrow starting trench. A broadfork can loosen a larger area with body weight and leverage, although it does not chop weeds or produce a fine seedbed. A hoe and garden rake belong in the finishing stage, not the initial breaking stage.
Match the tool to the obstruction rather than expecting one implement to do every job. For example, a fork is efficient in a previously cultivated vegetable bed containing fibrous annual roots. A spade may be faster where a neglected edge contains thick grass crowns. A mattock can address a small patch of hard, root-bound ground, but swinging it throughout an entire bed consumes energy and may damage shallow tree roots or buried irrigation lines.
Before digging, identify hoses, cables, edging, and nearby woody roots. Do not drive a tool blindly into an area where utilities may be present; use the relevant local utility-location service before disturbing uncertain ground. Inspect handles for cracks, wear sturdy footwear, and keep other people beyond the tool’s working arc.
A practical hand-tilling kit is compact:
- Digging fork: primary loosening tool for most existing beds.
- Spade: sod removal, edging, trenching, and cutting tough roots.
- Hoe: weed removal and shallow breakup of surface clods.
- Rake: final leveling and preparation of a seedbed.
- Bucket or tarp: collection of perennial roots, stones, and debris.
The common mistake is beginning with a rake or hoe on hard ground. Both tools treat the surface while leaving a dense layer underneath. For more detail on selecting and sequencing these implements, the site’s coverage of Hand-tilling a garden when machinery is unavailable can be used alongside the bed-specific decisions below.
Check Moisture Before Breaking Ground
Soil moisture determines whether hand cultivation creates stable crumbs or damaging lumps. Ground that is too wet smears against a spade, compresses underfoot, and forms dense clods that can harden after drying. Very dry clay resists penetration and breaks into large blocks, while powder-dry sandy soil offers little resistance but may lose its remaining moisture rapidly when disturbed.
Take soil from the intended working depth, not merely the dry surface. Squeeze it into a ball and press the ball with a finger. Suitable soil generally holds together briefly and then fractures or crumbles. Delay work if it feels slick, leaves a wet smear, or molds like putty. If the sample cannot be compressed and the fork barely enters, water the area moderately and test it again after moisture has moved below the surface. Avoid flooding immediately before digging.
Conditions can vary within one plot. A low corner may remain saturated while a raised edge is ready, and a shaded strip may dry days later than an exposed section. Work only the ready portion rather than applying one calendar date to the entire site. After rain, test beneath mulch as well as in uncovered ground because the two areas may differ sharply.
Walking patterns matter as much as the moisture test. Repeated steps over damp, freshly loosened ground squeeze out pore space and recreate compaction. Place a board across the bed if access from the sides is impossible, or divide a broad plot into permanent beds and paths. The board spreads body weight, but it does not make saturated soil safe to cultivate.
A weak assumption is that greater force compensates for poor timing. Forcing a fork through wet clay may appear productive, yet the shiny faces left by the tines and spade are signs of smearing. Striking concrete-dry ground, meanwhile, increases fatigue and tool stress without producing a usable planting layer. Waiting for a better moisture window often saves more time than working harder.
Progress is visible when loosened chunks separate along natural cracks and can be reduced with light rake pressure. Stop if footprints sink deeply, tool faces become coated with sticky soil, or each forkful emerges as a glossy slab. Those signals indicate that continued work is degrading the bed rather than preparing it.
Till the Bed in a Controlled Work Sequence
An edge-to-edge sequence prevents trampling and makes a large job measurable. Mark the actual planting area first, then clear wire, plastic, woody debris, and mature weeds. Cut weeds at the crown or lift perennial roots intact where possible. Chopping bindweed, quackgrass, or similar spreading roots into numerous pieces can distribute viable fragments throughout the bed.
Open a narrow strip at one end and work backward toward an established path. Insert the fork at regular intervals, rock it back to lift the soil, and move a short distance before repeating. The aim is connected loosening rather than complete pulverization. Break only clods that obstruct planting, and avoid throwing every forkful upside down unless sod burial or incorporation genuinely requires inversion.
Use this order for an uncultivated bed:
- Mark beds and walking lanes, then remove surface obstructions.
- Cut sod or lift persistent weed crowns before fragmenting the soil.
- Loosen one narrow strip with a fork or broadfork.
- Remove exposed stones and perennial root pieces by hand.
- Spread mature compost if an amendment is needed.
- Mix the compost into the upper layer with shallow fork or hoe movements.
- Rake level shortly before sowing or transplanting.
Adding compost between deep loosening and final raking keeps the operation efficient. A surface layer can be incorporated into the upper few inches without repeatedly turning the entire profile. Do not automatically add sand to clay in an attempt to make it loose; unsuitable proportions can create a dense, concrete-like mixture. Organic matter, protected soil, and gradual biological improvement are generally more practical for a home bed.
Consider a 12-foot bed that has been unused for a season. Trying to finish it in one continuous effort encourages rushed lifting and excessive clod chopping. Dividing it into three or four work zones allows the gardener to clear roots thoroughly, keep loosened areas untrampled, and stop before fatigue degrades technique. Lift with the legs, keep loads small, change tasks periodically, and pause if grip or back control deteriorates.
Hand work is slower than powered rotary tillage but more selective. A tiller rapidly fragments surface material, including weed rhizomes, and may make repeated passes tempting. Hand tools allow stones, roots, and soil condition to be assessed with each lift. The tradeoff is labor, so cultivate only the bed footprint instead of the surrounding paths. The same zone-by-zone principle is central to Hand-tilling a garden when machinery is unavailable on plots where access, fuel, cost, or equipment failure rules out powered machinery.
Set Depth by Crop Needs and Soil Condition
Useful tilling depth is determined by the restriction being corrected, not by the full length of the tool. A crusted bed that was loosened in a previous season may need only shallow surface cultivation. New ground with a compacted root zone may justify one deeper pass. Digging deeper than necessary increases labor, brings subsoil to the surface, and exposes dormant weed seeds to light and favorable germination conditions.
For direct-sown lettuce, carrots, or other small-seeded crops, the top layer must be level and fine enough to provide seed contact, but the entire bed should not be reduced to dust. A powdery surface can crust after heavy watering. Transplants such as tomatoes or peppers tolerate a coarser surface because their roots are already established in plugs, though the soil below each planting hole still needs connected cracks through which roots and water can move.
Root crops deserve special attention. Carrots planted into stony, compacted ground may fork or remain short, so remove obstructive stones and loosen the intended root depth. Potatoes can often be grown with less deep disturbance by placing seed pieces in a shallow trench and adding soil or mulch as stems rise. That approach may be preferable where dense subsoil makes full-bed excavation unrealistic.
Do not confuse temporary fluffiness with lasting structure. Aggressive chopping makes a bed look soft immediately, but fine particles can settle after irrigation and leave a sealed surface. Stable aggregates, root channels, organic matter, and earthworm activity create longer-lasting porosity. Preserve those features by lifting and cracking the soil rather than repeatedly beating it apart.
Check the result with the fork or a hand trowel. The tool should enter the intended rooting layer without meeting a continuous hard shelf, and water should soak in rather than pond on a polished surface. Large structural clods below the seedbed are not necessarily failures; they can maintain pore spaces and weather gradually. By contrast, a thin fluffy layer sitting above an untouched hardpan indicates incomplete preparation.
The misconception that every annual bed requires deep turning each spring creates avoidable work. Once drainage and rooting are satisfactory, shift to shallow weed control, surface compost, mulch, and targeted loosening where traffic or harvesting caused compression. This preserves labor for the sections that show an actual restriction.
Recognize Problems and Reduce Future Labor
A hand-tilled bed is ready when its surface matches the planting method and its lower layer admits roots, air, and water without having been pulverized. Evaluate the bed after settling or a gentle watering rather than judging only its freshly fluffed appearance. Ponding, a hard crust, exposed perennial roots, or deep footprints indicate unfinished work or unsuitable conditions.
Large clods usually point to moisture timing or clay texture, not a need for endless hammering. Let damp clods dry slightly, then tap them with the back of a rake. If dry blocks remain nearly solid, moisten the area and allow time for water to penetrate before trying again. Repeated blows waste energy and can produce an uneven mix of dust and hard chunks.
Rapid weed regrowth identifies another failure mode. Annual seedlings can be sliced shallowly on a dry day, but perennial weeds need their crowns and spreading roots removed persistently. Do not place vigorous rhizomes directly into a cool compost pile where they may survive. A marked bucket keeps them separate from finished compost and ordinary plant residue.
Reduce the next cultivation job by keeping feet in permanent paths and covering bare soil. Compost or leaf mulch buffers rain impact, moderates surface drying, and feeds organisms that create channels. Pull coarse mulch aside before direct sowing so seeds contact soil; return it after seedlings are established without burying their stems. Cover crops can protect larger plots, although their termination requires planning and may add labor when no mower is available.
Seasonal observation should guide future effort. If a fork enters easily, roots penetrate below the planting layer, and irrigation infiltrates evenly, another deep pass offers little benefit. Spot-loosen compacted harvest areas and leave the rest intact. If an entire bed remains dense despite correct moisture and added organic material, consider narrower permanent beds, raised growing areas, or crops suited to the existing conditions rather than repeating exhausting full-depth cultivation.
The most efficient version of Hand-tilling a garden when machinery is unavailable becomes less intensive over time. The first season may involve sod cutting, root removal, and deeper loosening. Later seasons should rely more on surface amendments and limited repair. Treating annual deep digging as mandatory ignores the soil improvements that careful bed management is meant to create.
Frequently Asked Questions
Can I till a bed by hand with only a shovel?
Yes. Use a spade to open narrow strips and lift small slices, but avoid repeatedly throwing heavy loads. A digging fork is usually less tiring where the goal is loosening rather than sod removal.
Should compost be added before or after loosening?
Loosen compacted ground first, spread mature compost, and incorporate it shallowly during finishing. This avoids burying the material deeply or turning the bed more than necessary.
How can I tell whether the ground is too wet to work?
Squeeze soil from below the surface. Postpone digging if it feels slick, smears on your hand or tool, or remains molded when pressed instead of breaking into crumbs.
Must every clod be broken apart?
No. Refine the upper layer enough for the chosen seeds or transplants, but leave stable crumbs and modest clods below it. Pulverized soil may crust and settle after watering.
Is annual deep hand-tilling necessary?
Usually not once the bed drains well and roots penetrate freely. Use mulch, surface compost, permanent paths, and targeted fork loosening to correct specific compacted areas.
Conclusion
Successful manual cultivation depends more on judgment than force. Begin by testing moisture, identifying obstructions, and assigning each tool a specific task. Loosen the plot in narrow strips while working from the cultivated area toward a path, remove persistent weed roots before fragmenting them, and refine only the layer required for sowing or transplanting. A bed that accepts water and permits root growth does not need to be reduced to powder or turned to maximum depth. After planting, protect the result with permanent walking lanes, surface organic matter, and prompt weed control. Recheck the bed in later seasons before digging deeply again; where structure and infiltration remain sound, shallow preparation and isolated repairs will conserve both the soil and the gardener’s energy.


