
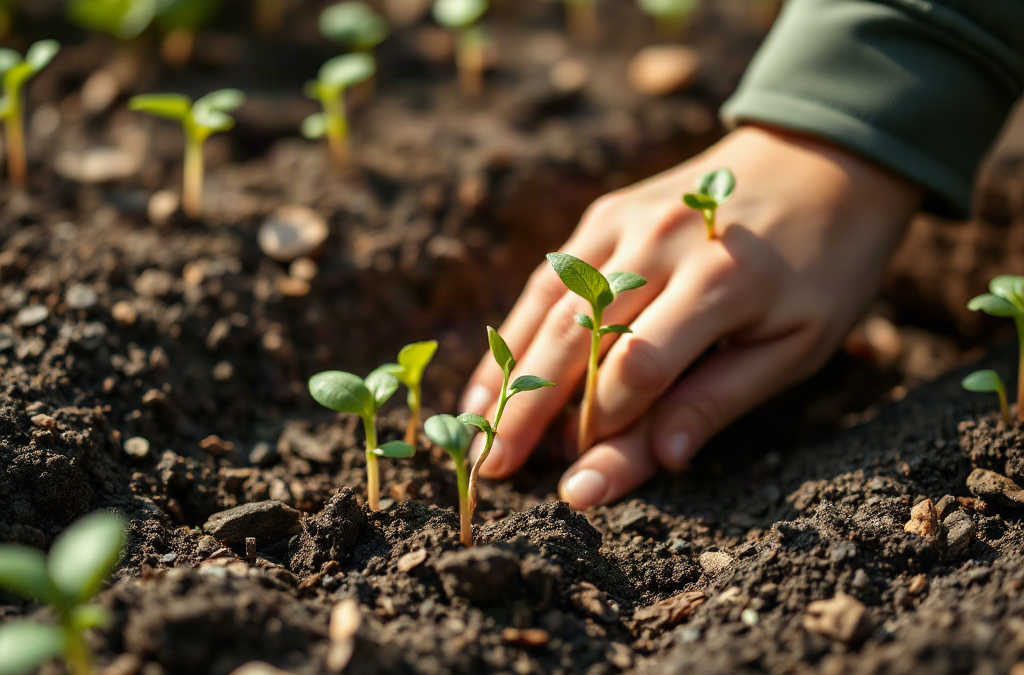
Planting depth errors weaken garden seedlings by delaying emergence, restricting early root growth, and exposing shallow roots to drying or poor anchorage. Seeds buried too deeply may exhaust their stored energy before reaching light, while seeds placed too close to the surface can dry out, wash away, or shed their seed coats poorly. Match depth to seed size, use the seed packet as the crop-specific reference, and measure from the settled soil surface rather than loose potting mix. When depth is uncertain, slightly shallow sowing is usually easier to correct with a light covering than excessive burial.
Why Incorrect Depth Produces Weak Seedlings
A germinating seed has a limited reserve of stored energy with which to produce its first root and shoot. Until leaves emerge and begin photosynthesis, that reserve powers every millimeter of growth. Excess soil above the seed lengthens the route to the surface and increases the physical resistance the shoot must overcome. A deeply buried seed may germinate successfully yet emerge late, pale, thin, or not at all.
Seed size influences how much burial a seedling can tolerate. A bean or pea contains substantial reserves and can push through a moderate covering. Lettuce, begonia, and many other fine seeds have much less stored energy. Some small seeds also germinate best with light or only a very thin covering. Treating every crop as though it needs the same deep hole is therefore a poor shortcut. Packet directions should take priority over a general rule because species differ in germination behavior.
Shallow placement creates a different set of pressures. The uppermost layer of a seedbed dries first, particularly in wind, direct sun, or warm indoor conditions. A seed may absorb water and start germinating, then die when that thin layer dries. Exposed seeds are also more vulnerable to displacement by watering, feeding birds, and temperature swings. If the seed survives, its first roots may develop close to the surface, leaving the seedling poorly anchored.
Depth also changes after sowing. Fluffy potting mix settles under water, heavy rain can erode a bed, and forceful watering can move uncovered seeds into low spots. A gardener who measures a hole correctly but leaves large air pockets may still end up with uneven placement. Gently firming the medium before sowing, then using a fine spray or bottom watering, keeps the intended depth more consistent.
Emergence patterns reveal more than a single failed seed. Slow, scattered sprouts in one row can indicate variable covering, especially when the same seed lot germinates evenly elsewhere. Seedlings with exposed roots point toward erosion or overly shallow sowing. Before blaming old seed, fertilizer, or disease, compare the planted depth with the packet instructions and inspect how the seedbed changed after watering. That simple check is central to evaluating planting depth errors that weaken garden seedlings.
Seven Planting-Depth Mistakes and Their Fixes
The most damaging errors often occur during bed preparation and covering rather than while the seed is placed. Correcting the process produces more uniform results than trying to rescue individual seedlings later. The following seven mistakes account for many preventable depth problems.
- Using one depth for every seed. Large and fine seeds do not have equal energy reserves or light requirements. Follow crop-specific packet directions; if none are available, use seed size only as a cautious starting point rather than a rigid formula.
- Measuring from loose soil. An unfirmed mix may settle substantially after watering, changing both depth and seed contact. Moisten and lightly level the medium first, make the depression, place the seed, and cover without compressing it into a hard layer.
- Making deep holes for tiny seeds. Fine seeds are easily lost in dibber holes or cracks. Sow them on a smooth surface and apply only the recommended dusting of fine medium, if any covering is required.
- Leaving large seeds partly exposed. Beans, peas, squash, and similarly substantial seeds need adequate contact with moist soil. Fill the hole completely and firm gently enough to remove major air gaps without compacting the bed.
- Adding mulch over newly sown rows. The soil covering may be correct, but a thick mulch layer creates additional material for shoots to penetrate. Keep coarse mulch away until seedlings have emerged and established leaves.
- Watering with a hard stream. Impact can uncover one section and bury another. Use a rose attachment, fine spray, or bottom watering for containers so the seed stays where it was placed.
- Transplanting stems at the wrong level. Seedlings are not interchangeable. Tomatoes commonly tolerate burial of part of the stem and can form roots along it, while many other transplants should remain at approximately the depth at which they grew in the container.
A practical sowing sequence reduces these errors. Prepare a fine, level seedbed; check the packet; mark a consistent furrow or depression; place the seeds; cover with measured material; and water gently. For a row, dragging a hoe corner through the soil often creates a more even furrow than making separate finger holes. For cell trays, a simple depth marker on a plant label can make repeated depressions more consistent.
Extra covering is not a reliable way to stop seeds from drying. It trades a moisture problem for an emergence problem. Use a humidity cover on indoor trays, shade cloth where appropriate, or more frequent gentle watering instead. Remove covers promptly after emergence so stems receive airflow and adequate light. The objective is steady moisture around the seed without forcing the shoot through unnecessary resistance.
Choosing Depth by Seed Size, Soil, and Sowing Method
Seed-packet directions provide the best starting depth, but soil texture and sowing conditions determine how that depth performs. A commonly used fallback is to cover a seed by roughly two to three times its thickness. That rule is unsuitable for seeds requiring light and should never override specific instructions, yet it offers a reasonable estimate when reliable crop information is unavailable.
Heavy clay or crust-prone soil calls for restraint. A thick clay covering can become dense after rain and form a surface crust that physically traps emerging shoots. Planting toward the shallower end of the recommended range and covering the row with a fine, compatible seed-starting material can reduce that resistance. Do not fill a deep trench with fluffy material that behaves completely differently from the surrounding bed; abrupt texture changes can affect moisture movement.
Sandy soil drains quickly and offers less resistance, so a seed may tolerate placement toward the deeper end of its recommended range. The benefit is access to more stable moisture. The tradeoff is that excessive depth still consumes the seed’s reserves, and sandy soil can erode during overhead watering. A light, settled covering combined with gentle irrigation is safer than simply burying seeds deeply.
Container sowing presents its own measurement problem. Seed-starting mix is springy when dry, and filling cells loosely before sowing can cause seeds to sink after the first watering. Pre-moisten the mix until it holds together when squeezed but does not drip, fill the cells, and tap the tray lightly. Create shallow depressions only after the surface has settled. Tiny seeds can be pressed onto the surface or covered with a sifted layer according to their germination needs.
Direct-sown rows must account for weather. Heavy rain shortly after planting can flatten loose soil and move fine seeds. In a dry spell, the surface may lose moisture several times a day. A board laid temporarily over certain slow-germinating rows can conserve moisture, but it must be checked daily and removed at the first sign of emergence; it is unsuitable for seeds that need light to germinate. Fine mesh or lightweight row cover can reduce disturbance without adding burial depth.
Transplants require a separate decision. Set the root ball so its top is level with the surrounding bed unless the crop is known to tolerate deeper stem burial. A peat pot should not protrude above the soil because the exposed rim can wick moisture away, but burying a crown or sensitive stem can encourage decay. Crop identity, stem anatomy, drainage, and current root-ball depth matter more than a universal transplant rule. Those distinctions keep planting depth errors that weaken garden seedlings from being repeated when plants move outdoors.
Diagnosing and Correcting a Depth Problem
Diagnosis begins with the emergence pattern, not with digging up the entire row. Compare the actual time since sowing with the expected germination window on the packet, while accounting for soil temperature. Cold soil can delay germination even when depth is correct, and saturated soil can deprive seeds of oxygen. Depth is a strong suspect when emergence is delayed or patchy despite suitable temperature, consistent moisture, and viable seed.
Open one or two inspection points carefully beside the row. Use a label or spoon to lift soil without cutting through the seed. A swollen seed with a long, pale shoot still below the surface was likely buried too deeply or trapped beneath crusted soil. A dry, unchanged seed near the surface points toward inadequate moisture. A soft, discolored seed suggests decay associated with excess water, poor aeration, or damaged seed rather than depth alone.
Do not pull a germinating seed upward and expect it to recover normally. Its root is fragile and often anchored below the seed. If the covering is only slightly excessive and the shoots are close to emerging, gently remove a thin, even layer from above the row without exposing roots. Break a surface crust with very light scratching between seedlings, taking care not to disturb the line of shoots. When seeds are far too deep, damaged, or decaying, resowing at the proper depth is usually more dependable.
Shallow seedlings need a different correction. If roots are visible but the plant remains upright, trickle fine soil around the base without burying the growing point. Water with a fine spray to settle the addition. Seedlings that have toppled because their roots never anchored may be replanted carefully if they still have healthy roots, although direct-sown root crops are poor candidates for disturbance. For carrots, radishes, and similar crops, resowing usually avoids malformed roots.
Watch the corrected area for even emergence, upright stems, and roots that remain covered after irrigation. Continuing failure appears as repeated exposure, surface crusting, seedlings unable to shed the soil layer, or increasing gaps in the row. These signs indicate that correcting depth alone was insufficient; irrigation force, soil texture, temperature, pests, or seed quality may also be involved.
Record the final sowing depth and conditions on a plant label or garden note. Include whether the bed was clay-rich, sandy, mulched, or covered. That record is more useful than memorizing one universal formula because it connects a crop with the conditions under which it actually emerged. A repeatable process—settled medium, measured placement, light firming, and gentle watering—provides the clearest defense against planting depth errors that weaken garden seedlings.
Frequently Asked Questions
How deep should most seeds be planted?
Use the packet directions first. Without crop-specific instructions, covering a seed by about two to three times its thickness is a cautious estimate, except for seeds that require light to germinate.
Can a seedling recover after being planted too deeply?
A seedling close to the surface may recover if a thin layer is removed carefully. Deep, pale, exhausted, or decaying sprouts are usually better replaced by resowing.
Why are my seeds exposed after watering?
A strong stream, loose covering, or sloped seedbed can move soil away from seeds. Apply fine soil over them and switch to a watering rose, mist, or bottom watering.
Should small seeds be covered with soil?
Some need a very fine covering, while light-dependent seeds should remain on the surface and be pressed into contact with the medium. Check instructions for the specific species.
Can every leggy transplant be planted deeper?
No. Tomatoes commonly tolerate deeper stem burial, but sensitive crowns and stems may rot. Keep unfamiliar transplants near their original container depth unless crop-specific guidance says otherwise.
Conclusion
Accurate depth begins before the seed enters the ground. Settle and moisten the growing medium, use crop-specific directions, create an even furrow or depression, and avoid changing the effective depth with heavy mulch or forceful watering. Fine seeds need particular protection from burial, while larger seeds still require a limit on how much soil their shoots must penetrate.
If emergence is uneven, inspect only a few points and distinguish excessive covering from cold soil, drying, saturation, or poor seed. Remove a slight excess carefully, cover exposed roots with fine material, and resow when seedlings are exhausted or decaying. Recording the depth, soil texture, and watering method turns a disappointing row into useful information for the next planting.
Further Reading
Authoritative Sources
- Gardening Ultimate Guide Common Mistakes to Avoid
jobs.nu.edu.pkCommon planting errors include sowing seeds too deep, spacing plants too closely to save space, and. Page 4. Gardening Ultimate Guide Common ...
- Struggling To Grow? Fix These 7 Seed-Starting Mistakes ...
gardeningknowhow.com1. Starting Seed Too Early · 2. Choosing the Wrong Seeds · 3. Planting Seeds That Aren't Viable · 4. Not Reading The Seed Packet · 5. Using the ...
- 10 Beginner Garden Mistakes and How to Fix Them
wildhearthlife.comTL;DR: The 10 most common beginner garden mistakes are planting too early, overwatering, ignoring soil health, crowding plants, skipping mulch, neglecting ...
- GARDENING TROUBLESHOOTING GUIDE COMMON ...
ftp.pluspetrol.netImproper planting techniques are responsible for nearly 30% of avoidable plant loss in home gardens, and this gardening troubleshooting guide ...


