
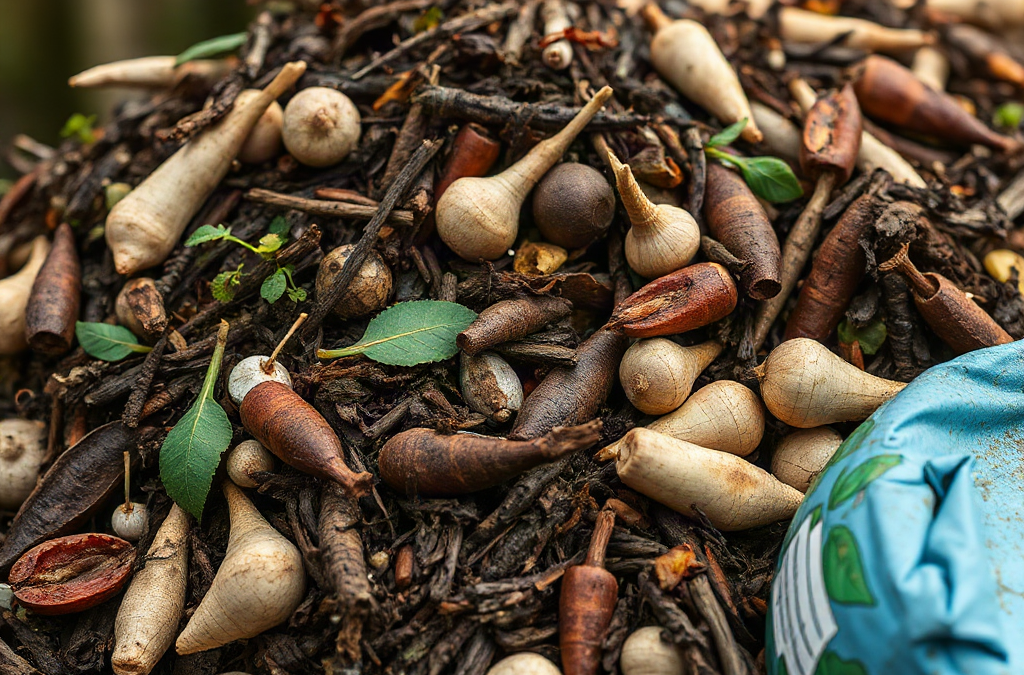
A bad-smelling compost pile should be opened, mixed, and corrected according to the odor: add dry carbon-rich material for a wet or sewage-like pile, or bury exposed food scraps when the smell resembles rotting garbage. Sour and ammonia odors usually indicate excess moisture, poor airflow, compacted grass clippings, or too many nitrogen-rich ingredients. Turn the pile while adding dry leaves, shredded plain cardboard, or untreated wood chips until its texture resembles a wrung-out sponge. Avoid masking the odor with soil, lime, or fragrance; restoring carbon, oxygen, moisture balance, and proper food-scrap placement addresses the decomposition problem instead.
Match the Odor to the Composting Problem
The character of the smell reveals more than its strength. Healthy active compost may have a mild earthy, leafy, or mushroom-like scent, especially immediately after turning. A persistent sewage, rotten-egg, sour, ammonia, or garbage odor points to a specific imbalance. Identifying that odor before adding anything prevents a common mistake: treating every smelly pile with the same bag of dry leaves.
A rotten-egg or sewage-like smell usually develops when excess water fills the air spaces between particles. Oxygen then moves through the pile too slowly for aerobic decomposers, while organisms that tolerate oxygen-poor conditions produce unpleasant compounds. Dense layers of fresh grass clippings are frequent culprits. Grass can mat together like wet felt even when the outside of the heap appears reasonably dry.
A sharp ammonia smell has a different cause. It often means the pile contains more readily available nitrogen than its current supply of carbon can hold. Large additions of fresh grass, manure, or kitchen scraps can create this condition. Turning may briefly make the smell stronger because trapped ammonia is released, but turning alone does not correct the ingredient imbalance. The pile needs dry, carbon-rich material mixed throughout it.
A garbage or rotting-food odor often comes from exposed scraps rather than the entire pile. A melon rind, cooked vegetable scraps, or a dense pocket of food near the surface can decay before the surrounding material absorbs its moisture. Meat, fish, dairy products, grease, and oily prepared foods are especially likely to smell and attract animals in an unmanaged backyard heap; local composting guidance may also exclude them.
Use both smell and touch to confirm the diagnosis. Squeeze material from the center while wearing gloves. Compost that drips or leaves the hand coated in slurry is too wet; material that holds together but releases no stream of water is closer to the desired condition. If the center is dry and unchanged, lack of moisture—not excess moisture—may have stalled decomposition, although a dry pile rarely creates a strong rotten odor. This odor-first diagnosis is the foundation of what to do when your compost pile smells bad without making the imbalance worse.
Correct a Wet, Airless Compost Pile
A saturated pile needs both absorbent carbon and newly opened air passages. Simply turning a soggy mass can introduce oxygen for a few hours, but fine, wet ingredients may settle back together. Mixing in dry materials with varied particle sizes creates a more durable correction: shredded autumn leaves absorb moisture, while coarse wood chips or chopped stalks preserve spaces through which air can move.
Begin by checking whether rainwater, roof runoff, or a low spot is continually soaking the heap. Move a portable bin or redirect runoff before rebuilding the pile; otherwise, added browns will eventually become waterlogged too. An uncovered heap can tolerate ordinary rain when it drains freely, but a tarp may be useful during prolonged wet weather. Keep it loose rather than sealing it around the sides, because an airtight cover traps moisture and restricts passive ventilation.
Open the pile and separate compacted clumps with a fork. Add dry leaves, torn uncoated paper, shredded plain cardboard, fine twiggy prunings, or a modest amount of untreated wood chips as you rebuild it. Mix rather than placing one thick brown layer on top. Thick sheets of paper and cardboard can form their own wet barriers, so tear or shred them and distribute them through the damp material.
For example, a bin filled with several mower bags of fresh grass may look dry on its crust while hiding a slimy green center. Moving the contents out, breaking apart the grass, and blending it with dry leaves changes both moisture retention and structure. Adding only a thin cap of leaves hides the surface but leaves the oxygen-starved core untouched. Likewise, punching a few holes into a dense mass is less effective than loosening the material throughout.
A successful repair produces a loose, damp mixture rather than a paste. The offensive smell should begin fading as oxygen returns, although a severely saturated pile may need more than one turning and additional dry material. Check it again after the ingredients have settled. If clumps are still slick or the rotten-egg odor intensifies, add more structure and verify drainage. If the pile becomes dusty and decomposition stops, the correction went too far; mix in small amounts of water while turning until the contents feel evenly damp.
Stop Garbage and Ammonia Odors
Food odors are best controlled at the point where scraps enter the pile. Place fruit and vegetable trimmings in the active center, break up dense quantities, and cover them on every side with existing compost and dry browns. Burial reduces exposed odor while bringing scraps into contact with decomposing material. It is more reliable than leaving food on top and sprinkling a token handful of leaves over it.
Keep a container of dry leaves or shredded cardboard beside the bin so every addition of wet scraps can be covered immediately. A countertop bucket emptied once or twice a week may contain a compact, watery mass; separate that mass while adding it rather than dropping it into one pocket. Large pieces decompose more slowly, but chopping everything into pulp can remove useful pore space. Roughly cutting oversized rinds and stems is generally enough.
If the pile smells strongly of ammonia, mix carbon-rich browns through the nitrogen-heavy zone. Fresh lawn clippings, coffee grounds, manure, and food scraps are commonly called greens because they tend to contribute more nitrogen and moisture, even when they are not green in color. Fallen leaves, straw, shredded cardboard, and woody plant matter function as browns. Exact ratios vary with moisture, particle size, and the condition of each ingredient, so the pile’s texture and odor are more useful than chasing a rigid recipe.
Do not add garden lime as a routine odor treatment. Raising the pH can encourage more nitrogen to escape as ammonia, wasting a useful compost nutrient while potentially sharpening the odor. A soil covering can temporarily contain smells but may also compact the surface; finished compost and loose browns make better covers. Avoid adding bleach, disinfectants, scented products, or chemical deodorizers, which mask the symptom without restoring aerobic decay.
Persistent garbage odor can also indicate an unsuitable feedstock. Remove meat, dairy, grease, and heavily oily foods if they were added accidentally and remain identifiable. Animal manure requires separate judgment: manure from herbivores may be composted under suitable conditions, but dog and cat waste should not enter compost intended for food gardens because an ordinary backyard pile cannot be assumed to manage pathogens reliably. Good decisions about what to do when your compost pile smells bad include removing problematic inputs, not merely adding more material around them.
Use a Focused Odor-Repair Sequence
A deliberate repair sequence prevents unnecessary additions and makes progress easier to judge. The priority is to stop ongoing water or unsuitable inputs, expose the affected material, and then correct the specific imbalance. Repeatedly tossing browns onto an unopened pile may consume supplies without reaching the wet core.
- Inspect the location and inputs. Look for runoff, a blocked base, dense grass layers, exposed scraps, and foods that do not belong in the system.
- Open the center. Pull material apart on a tarp or in an adjacent bay so compacted pockets become visible.
- Correct while rebuilding. Blend dry absorbent browns into wet material, add coarse plant matter where structure is poor, and bury acceptable food scraps.
- Test the texture. Aim for evenly damp material that holds together when squeezed but does not release a stream of water.
- Recheck rather than overcorrect. Allow airflow and microbial activity time to respond, then inspect the center for recurring wetness or odor.
Turning frequency should match the pile rather than a calendar. A newly repaired, actively heating pile may benefit from another turn if the center compacts or develops odor again. A small, cool pile does not need constant disturbance; frequent turning can release moisture and heat faster than the limited mass can retain them. Passive composters can improve airflow by mixing in coarse browns even if they do not pursue rapid, hot composting.
Signs of improvement include a less offensive smell, more uniform moisture, recognizable ingredients beginning to soften, and a crumbly rather than slimy center. Heat may occur when enough nitrogen, moisture, oxygen, and mass are present, but it is not the only proof that composting works. A modest backyard pile may decompose slowly without becoming noticeably hot. Judge odor control and structural change alongside temperature.
Failure has equally useful signals. A renewed sewage smell suggests the pile remains waterlogged or has collapsed again. Continued ammonia odor indicates that nitrogen-rich material still dominates. Scraps remaining wet and recognizable in a smelly pocket show that they were not dispersed or covered adequately. If the pile is dry, cool, and unchanged after adding large quantities of browns, moisten it gradually rather than adding more greens immediately. This measured approach avoids swinging from one imbalance to another.
Prevent the Smell From Returning
Odor prevention depends on maintaining structure as new ingredients arrive. Backyard piles often become smelly after a single large seasonal addition, such as spring grass clippings or a bucket of fallen fruit. Adding those materials in thin, mixed portions is safer than creating a concentrated layer. If there are not enough dry browns available, store some of the nitrogen-rich material temporarily, grass-cycle clippings onto the lawn, or add them over several weeks.
Keep the base in contact with soil when the bin design allows it, but choose a location that drains rather than a depression that collects water. A base layer of coarse twigs can help initially, although it eventually decomposes and cannot compensate for poor siting. Bins with solid bottoms need functioning drainage openings. Enclosed tumblers avoid ground saturation but can still become wet and compacted when loaded mainly with kitchen scraps; rotation mixes contents, yet it cannot manufacture the missing carbon.
Maintain a practical reserve of browns. Dry leaves are especially useful because they absorb moisture and blend easily. Shredded plain cardboard is a helpful supplement when leaves are scarce, but glossy, plastic-coated, or heavily laminated packaging does not belong in the pile. Sawdust can absorb substantial moisture, though fine material may compact and should be mixed sparingly; use only sawdust from clean, untreated wood.
Weather changes the management choice. During a rainy period, protect the top while preserving side airflow and check drainage. During hot, dry weather, place food scraps in the damp interior and water only as needed. In winter, decomposition may slow and fresh scraps can accumulate faster than they break down, so smaller additions and generous brown coverage become more valuable. Slow activity in cold conditions is not itself a failure.
A brief check whenever material is added is more effective than waiting for neighbors to notice an odor. Look for exposed food, squeeze a handful from below the surface, and break apart any matted layer. Keep the lid secure where rodents or other animals are a concern, but do not confuse pest exclusion with airtight storage. Compost organisms still need oxygen. The goal is not a sterile or odorless container; it is a biologically active pile whose normal earthy scent does not travel beyond the immediate composting area.
Frequently Asked Questions
Why does my compost smell like rotten eggs?
A rotten-egg smell usually indicates wet, compacted material with too little oxygen. Break apart the center, correct any drainage problem, and mix in dry leaves plus coarse plant material to restore air spaces.
Should I add lime to smelly compost?
No. Lime is not a routine compost deodorizer and may increase the loss of nitrogen as ammonia. Correct excess moisture, insufficient carbon, exposed food, or compaction instead.
How much brown material should I add?
Add enough dry browns to absorb free moisture and separate sticky clumps. Mix incrementally, checking for a loose texture that feels like a wrung-out sponge rather than relying on an exact volume ratio.
Will turning the compost remove the odor?
Turning introduces oxygen, but the smell may return if the pile remains saturated or nitrogen-heavy. Combine turning with dry carbon, better drainage, or removal of unsuitable food as the condition requires.
Can smelly compost still be used in the garden?
Do not use it while it is slimy, foul-smelling, hot, or full of recognizable scraps. Let it finish until it is dark, crumbly, earthy-smelling, and no longer reheats substantially after turning.
Conclusion
Compost odor is a working clue rather than a reason to discard the whole pile. Diagnose the scent, inspect the center, and correct the conditions where decomposition is going wrong. Sewage and rotten-egg odors call for drainage, aeration, and structural browns; ammonia calls for more carbon; garbage smells call for properly buried scraps and removal of unsuitable foods.
After rebuilding the pile, judge progress by texture and recurring odor rather than expecting an instant transformation. Keep dry leaves or shredded cardboard nearby, mix concentrated additions instead of layering them, and protect the heap from runoff without sealing out air. A short moisture and food-coverage check each time the bin is opened will prevent most repeat problems and produce more dependable finished compost.


