
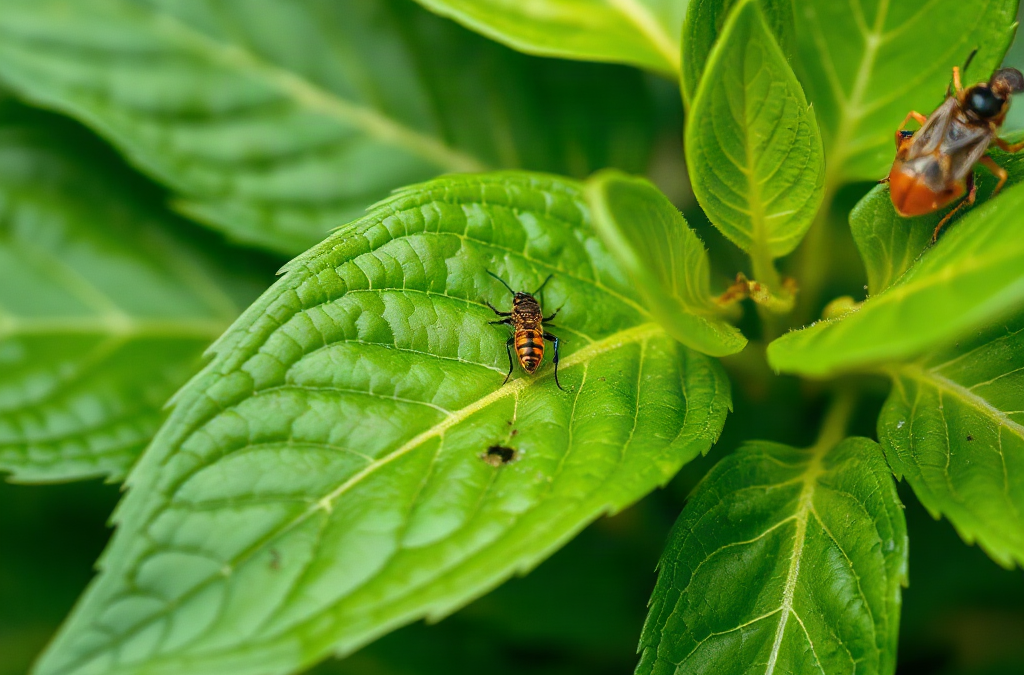
Recognize pest damage early by inspecting new growth, leaf undersides, stems, and nearby soil for feeding marks, insects, eggs, webbing, frass, and sticky residue. Chewed edges and holes often point to caterpillars, beetles, or slugs, while stippled leaves may indicate sap-feeding mites or thrips. Check plants in the morning and compare damaged tissue with healthy growth because drought, nutrient problems, and disease can look similar. Photograph unfamiliar symptoms, inspect several plants, and isolate a likely source before treating.
Where Early Pest Damage Appears First
Early pest activity is easiest to detect on tender growth, leaf undersides, stem joints, flower buds, and the soil surface immediately around a plant. Young leaves have softer tissue and are often more attractive to aphids, thrips, and caterpillars, while many insects avoid the exposed upper leaf surface during bright, hot weather. A quick glance across the bed can miss the first evidence because the damage may be limited to a few pale dots, a curled edge, or a small cluster of insects.
Inspecting the plant in zones gives better results than looking for dramatic holes. Begin with the newest leaves, then turn mature leaves over and examine the midrib and veins. Check stems where leaves join the main stalk, since scale insects and aphids may gather there. Look beneath containers and mulch for slugs, earwigs, or daytime hiding places. Sticky leaves may contain honeydew from sap-feeding insects; dark sooty growth on that residue is a secondary clue rather than the original problem.
Plant stress can imitate pest injury. Heat may curl leaves, irregular watering can cause wilting, and nutrient shortages may produce pale or distorted growth without any insects present. Compare several plants growing under similar conditions. If only one plant has fresh damage while its neighbors look normal, localized pest activity becomes more plausible. If an entire row changes at once, examine watering, roots, weather exposure, and soil conditions before assuming insects are responsible.
A useful early-warning habit is to photograph a suspicious leaf beside a healthy one and record the date. Fresh damage usually has sharper edges or brighter tissue exposure than older injury, which may dry, discolor, or become colonized by microbes. Monitoring the direction of change matters more than judging one imperfect leaf.
Matching Damage Patterns With Likely Pests
Damage patterns narrow the search, but they rarely identify a pest with certainty by themselves. Ragged holes through leaves commonly come from caterpillars, beetles, or slugs. Caterpillars may leave dark droppings, called frass, on lower leaves or inside folded growth. Slugs often produce irregular holes and shiny trails, especially after damp nights. Beetles may create neat pits, windowpanes, or small round holes depending on the species and plant tissue they consume.
Fine pale speckling across a leaf suggests repeated piercing and sucking rather than chewing. Spider mites can produce stippling and, as activity increases, delicate webbing around leaf stalks or shoot tips. Thrips may leave silvery streaks, distorted young growth, or black fecal spots. Aphids cluster around soft shoots and may cause curling, sticky deposits, or stunted new leaves. Whiteflies scatter when foliage is disturbed, while their immature stages remain attached to the undersides of leaves.
Stem injury requires a different line of reasoning. Sawdust-like material, wilted shoots, entry holes, or a sudden collapse above one section of stem may indicate a boring insect. Swollen roots, weakened seedlings, or plants that wilt despite moist soil can point toward root-feeding pests, although root disease and poor drainage can create similar symptoms. Digging up one representative plant is more informative than treating the entire bed blindly.
Do not treat every hole as an emergency. A few eaten leaves on a vigorous plant may have little effect, whereas damage concentrated on seedlings, growing points, flowers, or fruit can alter the harvest. The practical question is whether injury is increasing, whether the pest is still present, and whether valuable tissue is being lost. If identification remains uncertain, preserve a clear photograph or a sample in a sealed container and consult a local university extension service or plant diagnostic resource.
A Reliable Inspection Routine Before Treatment
A repeatable inspection routine prevents a single visible symptom from driving the wrong response. Examine plants during a cool part of the day, when leaves are less wilted and many pests are active. Use a hand lens for tiny insects, eggs, and mites, and carry a white sheet of paper beneath a branch. Tapping foliage over the paper can reveal small moving insects that are difficult to see against green leaves.
Work from the outside of the planting inward. First note which plant types are affected and whether damage is concentrated along an edge, near weeds, beside a structure, or under a particular tree. Then inspect five or more representative plants when the planting is large enough to allow comparison. Record the number of damaged leaves, the newest symptom, and any live pest evidence. Rechecking after a short interval shows whether the pattern is advancing or merely old injury.
Use this compact field checklist:
- Turn over leaves and inspect veins, folds, and petioles.
- Look for eggs, shed skins, webbing, frass, honeydew, and trails.
- Examine stems, buds, flowers, fruit, and the soil line.
- Compare symptoms with drought, disease, herbicide drift, and nutrient stress.
- Photograph the plant and note weather, watering, and recent garden work.
The strongest confirmation combines a feeding sign with a living pest or a trace it leaves behind. For example, silvering alone could reflect several stresses, but silvering plus thrips and black specks makes the diagnosis more credible. Conversely, spraying after finding only a yellow leaf is a weak decision because the treatment may harm beneficial insects without addressing the cause.
Check nearby weeds and volunteer plants as well. They can harbor pests even when the crop appears clean, and removing them may reduce pressure in one situation while disturbing soil or beneficial habitat in another. Prioritize evidence collection before cleanup, particularly when the pest is small, nocturnal, or likely to leave the plant after daylight.
What To Do After Confirming Pest Activity
The appropriate response depends on pest identity, plant value, damage speed, and the location of the infestation. For a small, localized cluster, hand-picking, pruning an infested shoot, washing soft-bodied insects from sturdy foliage, or removing a heavily affected leaf may be enough. These actions work best when repeated inspections catch reinvasion before the pest spreads to new growth.
Physical barriers are more useful before damage becomes widespread. Row covers can exclude some flying insects from suitable crops, but they must be installed before pests are trapped underneath and removed when pollination is needed. A collar or carefully maintained growing area may reduce access by crawling pests. Barriers have practical costs: they require regular inspection, can increase heat, and may interfere with watering or flower visits.
Biological control and selective products require equal care. Beneficial insects such as lady beetles, lacewings, predatory mites, and parasitic wasps may already be suppressing a population. Broad-spectrum sprays can remove those allies along with the target pest. If a product is warranted, identify the pest first, read the label for the crop and application site, follow protective instructions, and avoid spraying open flowers or active pollinators. More product is not a substitute for correct timing.
Judge the response by new growth and fresh evidence, not by whether every damaged leaf looks perfect. Old holes will remain, but successful intervention should reduce live pests and slow the appearance of new injury. If damage continues, check whether the treatment reached leaf undersides, whether eggs survived, whether a second pest is present, or whether the original diagnosis was wrong. Severe wilting, stem collapse, or damage to a valuable plant may justify advice from a local diagnostic service rather than repeated experimentation.
Mistakes That Delay Effective Pest Control
The most costly mistake is treating symptoms without confirming the cause. Leaf spots caused by fungi, virus-like disorders, sunscald, and chemical drift may be mistaken for feeding injury. Spraying an insecticide in those cases adds risk without correcting the problem. Another common error is inspecting only the top of leaves, even though aphids, whiteflies, mites, eggs, and thrips often remain underneath.
Waiting for dramatic damage also reduces options. A small aphid colony can be removed directly, while a large population may curl new growth and spread through neighboring plants. The opposite error is reacting to one or two harmless insects. Some insects are visitors, decomposers, pollinators, or predators, and their presence does not prove they are causing the observed injury.
Garden cleanliness should be selective rather than absolute. Removing badly infested plant material can lower pest pressure, but stripping every damaged leaf may reduce photosynthesis and slow recovery. Pruning is most useful when the affected tissue is expendable and the plant has enough healthy foliage remaining. Likewise, excessive watering or fertilizing in an attempt to help a stressed plant can create softer growth that attracts sap-feeding pests or worsens root problems.
Build monitoring into ordinary care. During watering, scan new growth and leaf undersides; after rain, inspect for slug trails; after a warm, dry stretch, look for stippling and webbing. Keep notes for recurring seasonal patterns, and use how to recognize signs of pest damage early as a reference when symptoms first appear. Pair that habit with related observations about how to recognize signs of pest damage early rather than relying on a calendar-based spray schedule.
Early recognition is not the same as immediate eradication. The better goal is to confirm the pest, protect high-value growth, preserve useful organisms, and measure whether fresh damage is slowing. That approach is usually less disruptive than repeated, unidentified treatments.
For identification help, compare photographs and symptom descriptions from a local university extension service, state agriculture department, or recognized plant diagnostic laboratory. These sources can account for regional pests and distinguish insect injury from disease, environmental stress, and herbicide damage.
Frequently Asked Questions
What is the first place to inspect for pest damage?
Start with new growth and leaf undersides, then check stem joints, buds, the soil line, and nearby weeds. Many small pests avoid exposed surfaces.
How can I tell chewing damage from sap-feeding damage?
Chewing pests leave holes, notches, or scraped tissue. Sap-feeding pests more often cause stippling, curling, yellowing, sticky honeydew, silvering, or distorted growth.
Should I remove every leaf with a hole?
No. Remove leaves only when injury is severe, actively infested, or likely to spread. Healthy remaining foliage is needed for recovery and continued growth.
When should a pest problem be treated?
Treat when live pests and increasing damage are confirmed, especially on seedlings, growing points, flowers, or fruit. A few isolated insects may not justify intervention.
Why does pest damage continue after spraying?
The product may not match the pest, reach hidden insects, affect eggs, or prevent reinfestation. Reinspect the plant and surrounding weeds before repeating any treatment.
Conclusion
Early pest detection depends on observing patterns rather than reacting to one imperfect leaf. Inspect tender growth, leaf undersides, stems, buds, soil surfaces, and nearby weeds, then compare the evidence with watering problems, disease, nutrient stress, and chemical injury. Holes, stippling, webbing, frass, honeydew, trails, and live insects each narrow the possibilities, but confirmation should come before treatment. Start with the least disruptive response that fits the scale of the problem, protect beneficial organisms, and judge success by fewer live pests and less fresh damage. Keep dated photographs and brief notes so recurring problems become easier to recognize. When symptoms are severe or uncertain, a local extension or diagnostic service can prevent wasted treatments and unnecessary damage.


