
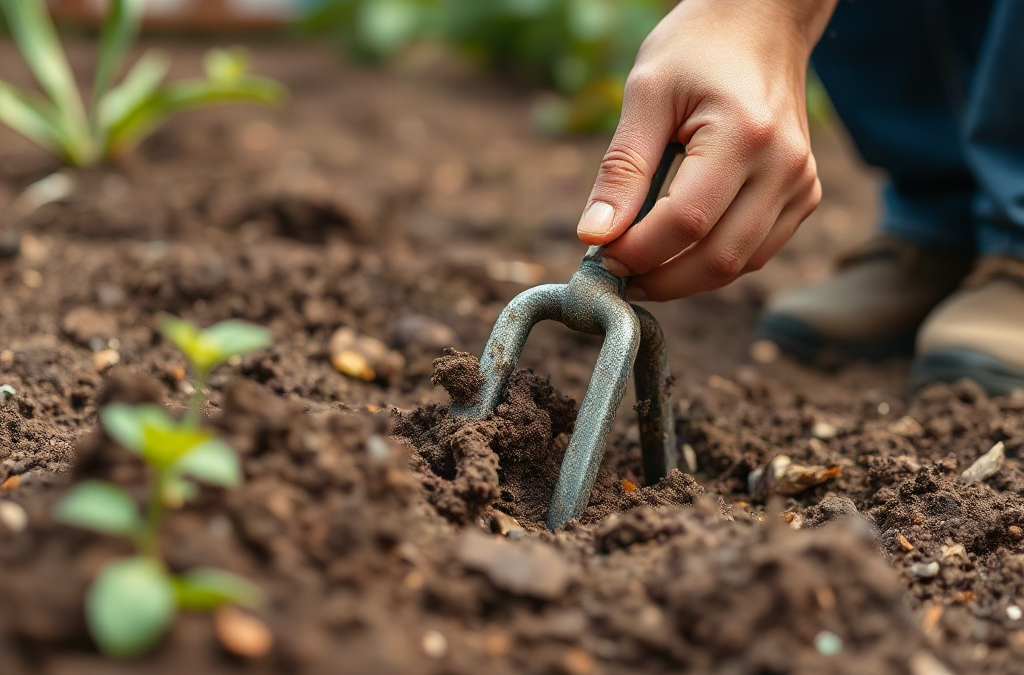
Tilling a garden without damaging soil structure means disturbing only the planting layer, working when the ground is moist but crumbly, and avoiding repeated passes that pulverize aggregates. Test moisture by squeezing a handful: postpone tilling if it forms a sticky ribbon or hard ball, and add water first if dry soil turns to dust. Use a fork, broadfork, hoe, or shallow-set tiller according to the compaction problem rather than automatically cultivating the entire bed. Keep established paths out of planting areas, incorporate amendments near the surface, and stop once roots can enter the loosened layer without encountering dense clods or a compacted pan.
Why Excessive Tillage Breaks Down Garden Soil
Healthy garden soil is arranged in aggregates: small clusters of mineral particles, organic matter, fungal material, roots, water, and air spaces. Those clusters let rainfall enter while leaving pores through which oxygen moves and roots grow. Cultivation is useful when it opens genuinely compacted ground or prepares a neglected plot, but aggressive tilling can crush the same arrangement the gardener is trying to improve.
A rotary tiller cuts roots and aggregates into smaller pieces while mixing the cultivated layer. One controlled pass through suitable soil may produce a workable seedbed. Repeated passes, especially at high speed, can reduce the surface to fine particles. After rain or overhead irrigation, those particles may settle together and form a crust. The bed looks soft immediately after cultivation yet becomes denser as it dries. Fine pulverization is therefore not the same as lasting tilth.
Working at one fixed depth creates another problem. Tiller tines repeatedly press and smear the soil immediately beneath their reach, particularly when the ground is wet. The resulting dense boundary is often called a tillage pan. Water may perch above it, and vegetable roots may turn sideways instead of continuing downward. Digging deeper every year is not an automatic solution; it can simply relocate disturbance and bring low-organic-matter subsoil to the surface.
Untilled ground is not automatically well structured either. A former lawn, construction-disturbed yard, or bed used as a walkway can be too dense for young roots. In that situation, a one-time loosening may cause less long-term damage than trying to grow through severe compaction. The useful distinction is corrective cultivation versus habitual cultivation. Corrective work addresses a diagnosed restriction; habitual work repeats because the calendar says it is time.
For gardeners considering Tilling a garden without damaging soil structure, the practical goal is not perfectly fluffy earth. Aim for stable crumbs, visible pores, steady drainage, and enough resistance to hold plants upright. Soil that collapses into dust under the machine has been worked too finely, while slabs that remain glossy and sticky were handled too wet.
Check Moisture and Compaction Before Disturbing the Bed
Moisture determines whether cultivation fractures soil along natural weak points or smears it into dense plates. Take samples from the intended working depth rather than judging only the dry surface. Squeeze each sample firmly, then press it with a thumb. Soil near a workable moisture level forms a weak ball that breaks apart with modest pressure. If it coats the fingers, bends into a ribbon, or retains a shiny compressed face, wait. If it will not cohere at all and creates airborne dust, irrigate lightly and reassess after moisture has moved downward.
Texture changes how that test should be interpreted. Sandy soil may be workable soon after rain because large particles leave broad drainage pores. Clay-rich soil has a much narrower window: saturated clay smears, while very dry clay breaks into hard chunks that a tiller may merely batter into smaller clods. Loam usually crumbles across a wider moisture range, but repeated traffic can still compact it. A shaded lower bed may also remain wet several days longer than a sunny raised bed in the same yard.
Next, determine whether compaction is widespread or localized. Push a straight garden fork, steel rod, or narrow soil probe into several spots while moisture is moderate. Sudden resistance at a consistent depth can indicate a dense layer. Compare planting rows with paths. If the probe enters rows readily but stops in walkways, the soil is responding normally to traffic and the bed itself may not need tilling. If only the headland where a wheelbarrow turns is hard, loosen that zone rather than processing the entire plot.
Drainage and plant roots provide additional evidence. Water lingering after ordinary rainfall, roots spreading horizontally at the same depth, or seedlings struggling in a visibly sealed surface can justify intervention. Earthworms alone are not a compaction test, and a few clods do not prove failure. Dense clay naturally feels firmer than sandy loam even when it has functional pores.
A compact pre-tillage check keeps the decision grounded:
- Moisture: crumbly rather than sticky, glossy, powdery, or rock-hard.
- Restriction: confirmed at several points, not assumed from appearance.
- Area: mapped to beds, rows, or isolated traffic zones.
- Purpose: defined as compaction relief, amendment incorporation, or seedbed preparation.
Postponing work is often the most protective choice. Planting a few days later usually carries less cost than cultivating wet clay and living with smeared layers for a season or longer.
Match the Tool and Tilling Depth to the Job
Tool choice should follow the diagnosed restriction. A hoe or hand cultivator is appropriate for breaking a thin surface crust and clearing small weeds. It disturbs only the top layer, leaving deeper channels intact. A digging fork can loosen a small compacted patch by entering vertically and rocking gently without turning the profile upside down. For established beds, those tools offer better control than a powered tiller.
A broadfork is useful where an entire bed has become dense but does not need complete mixing. Its long tines enter the ground, and the handles provide leverage to lift and crack the profile. The operator steps backward rather than walking repeatedly over loosened soil. Broadforking preserves more layering and residue than rotary cultivation, although it requires physical effort and may be impractical in stony ground or around dense perennial roots. It also loosens rather than finely preparing the surface, so a rake may still be needed for small seeds.
A rotary tiller earns its place when converting an open, severely compacted plot, incorporating a substantial amendment into a new bed, or preparing a larger area that hand tools cannot reasonably cover. Set the first pass shallow and move steadily. If another pass is truly necessary, deepen it modestly after inspecting the result. Racing the engine, holding the machine in one spot, or crossing the plot repeatedly creates an unnecessarily fine seedbed and increases mixing below the useful root zone.
Amendment placement affects the required depth. Finished compost spread across an established bed can often remain at the surface, where irrigation, roots, soil organisms, and later planting gradually integrate it. If incorporation is needed for a new bed, mix it only through the intended topsoil layer. Do not bury coarse wood chips, unfinished compost, turf chunks, or fresh manure deeply; decomposition conditions and nutrient availability differ below the aerated surface, and uneven pockets can interfere with rooting.
Rototilling around perennial crops is especially risky. Tines can cut shallow feeder roots of berries, asparagus, shrubs, and fruit trees even when stems are several feet away. Surface mulch and careful hand weeding are safer in established root zones. Likewise, beds filled with drip tubing, buried irrigation, landscape fabric, or utility lines require verification before any powered equipment enters.
The best method for Tilling a garden without damaging soil structure may involve no rotary tiller at all. Reserve high-disturbance tools for high-need conditions, and use a fork, rake, or hoe when the task is shallow and precise.
Use a Low-Disturbance Tilling Sequence
A controlled sequence prevents extra passes and keeps foot traffic from undoing the work. Begin by marking permanent beds and access paths. Remove wire, large stones, woody stems, irrigation components, and other objects that can catch tines. Cut tall vegetation at the surface first; forcing a tiller through tangled vines produces uneven digging and encourages the operator to revisit the same strip.
Spread only the amendment the bed actually needs. A visible layer of finished compost may improve the surface condition of low-organic-matter soil, but adding more material does not justify deeper mixing. Fertilizer decisions should follow crop needs and, where available, a soil test. Tillage cannot correct an inappropriate pH, excessive nutrient level, poor site drainage, or chronic compaction caused by continued walking.
- Open the surface lightly. Make one shallow pass or use a fork to fracture the upper layer.
- Inspect before continuing. Look for crumbs, intact pores, root channels, and any resistant layer below.
- Loosen only where needed. Rock a fork or broadfork through dense zones, or make one measured tiller pass.
- Level without crushing. Pull a rake lightly across the bed instead of repeatedly combing it smooth.
- Leave from the path. Avoid stepping on the prepared planting surface.
Consider a new vegetable plot on former lawn. After removing or smothering the sod, the gardener finds compacted topsoil but no sharp pan. One slow, shallow tiller pass may mix remaining fine roots and compost adequately. A second pass adds little if the first leaves medium crumbs and a fork enters easily. By contrast, if a probe reveals a dense layer beneath the sod, broadforking before shallow surface preparation addresses the restriction without pulverizing the whole profile.
Seed size should influence the finish. Carrots and lettuce benefit from a finer surface immediately around the sowing line, but the entire bed does not need to resemble potting mix. Beans, squash, and transplants tolerate larger crumbs. Prepare a narrow seed strip with a rake or hand tool rather than processing every square foot to the standard required by tiny seeds.
Stop when the stated purpose has been achieved. Useful signs include roots and a fork entering without an abrupt barrier, clods breaking with hand pressure, and water soaking in rather than ponding immediately. Warning signs include dust clouds, a flour-like surface, shiny sliced faces, soil sticking heavily to tines, or water collecting above the worked depth. Those conditions call for stopping, not another corrective pass.
Protect the Bed After Tilling
Freshly loosened soil is vulnerable until roots and organic residues stabilize it. Bare particles can seal under pounding rain, erode down a slope, or settle after heavy irrigation. Apply a suitable surface cover after planting: clean straw around larger vegetables, shredded leaves between established rows, or a thin layer of screened compost over a seedbed. Keep coarse mulch away from direct contact with tiny emerging seedlings, where it can block light and create an uneven stand.
Permanent paths provide the largest structural benefit for little effort. Size beds so their centers can be reached without stepping inside them, then direct routine traffic to mulched or firm paths. A single footprint on wet soil can compress a surprisingly deep pocket, and repeated kneeling in the same place creates hard edges. Lay a board temporarily across a bed only when access is unavoidable; it distributes weight, though it should not become a permanent walkway over crop roots.
Irrigation should wet the root zone without hammering an unprotected surface. A breaker nozzle, drip line, or gentle sprinkler applies water with less particle displacement than a concentrated hose stream. Watch what happens after the first thorough watering. Modest settling is normal, but widespread crusting, persistent puddles, or cracks opening over a dense layer suggest that cultivation produced a temporary cosmetic improvement rather than functional structure.
Living roots provide longer-lasting reinforcement. Closely spaced crops, short-season cover crops, and overwintering roots create channels and feed soil organisms. Choose cover crops according to the available planting window and a realistic termination method; allowing a vigorous cover to mature without a plan can create more cultivation work. Where a bed remains continuously planted, cut residues at the surface and leave roots to decay in place when crop health permits.
Reassess before the next season rather than scheduling annual tillage. If a fork enters readily, drainage remains even, and crops root below the former working depth, shift to surface compost, targeted planting holes, and shallow weed control. If compaction returns, identify its source—walking, working wet ground, wheel traffic, or inadequate drainage—before loosening again. Repeating Tilling a garden without damaging soil structure without changing the cause only resets the problem temporarily.
Frequently Asked Questions
How wet is too wet for tilling?
Soil is too wet when a sample from working depth feels sticky, forms a durable ball or ribbon, or develops a shiny face when pressed. Wait until it crumbles under moderate finger pressure.
How deep should a garden tiller go?
Use the shallowest depth that accomplishes the specific task. Start near the surface, inspect the profile, and deepen only enough to relieve a confirmed restriction or incorporate material through the intended planting layer.
Can compost be left on top without tilling it in?
Yes. Finished compost can serve as a surface dressing in established beds, where planting, water, roots, and soil organisms gradually integrate it. Shallow incorporation may be useful when forming a new bed.
Is a broadfork better than a rototiller?
A broadfork causes less mixing and suits established compacted beds, but it requires more labor. A rototiller is more practical for some large new plots, provided moisture, depth, and pass count are controlled.
Should the garden be tilled every spring?
No. Till only when tests reveal compaction or a specific preparation task requires mixing. Beds with good drainage, easy probe penetration, and stable crumbs often need only surface compost and localized planting preparation.
Conclusion
Successful cultivation is measured by how the bed performs after rain and planting, not by how finely the surface is pulverized. Check moisture below the surface, confirm where resistance occurs, and select the least disruptive tool that can correct it. A hoe may handle a crust, a fork or broadfork may relieve localized density, and a rotary tiller may be justified for a compacted new plot.
After working the ground, protect the result with fixed paths, gentle watering, surface cover, and living roots. Recheck infiltration, crusting, and rooting before cultivating again. If the bed remains porous and roots cross the former working depth, skip routine tillage and prepare only planting rows or holes. If density returns, correct the traffic, drainage, or moisture mistake responsible before reaching for the machine.


