
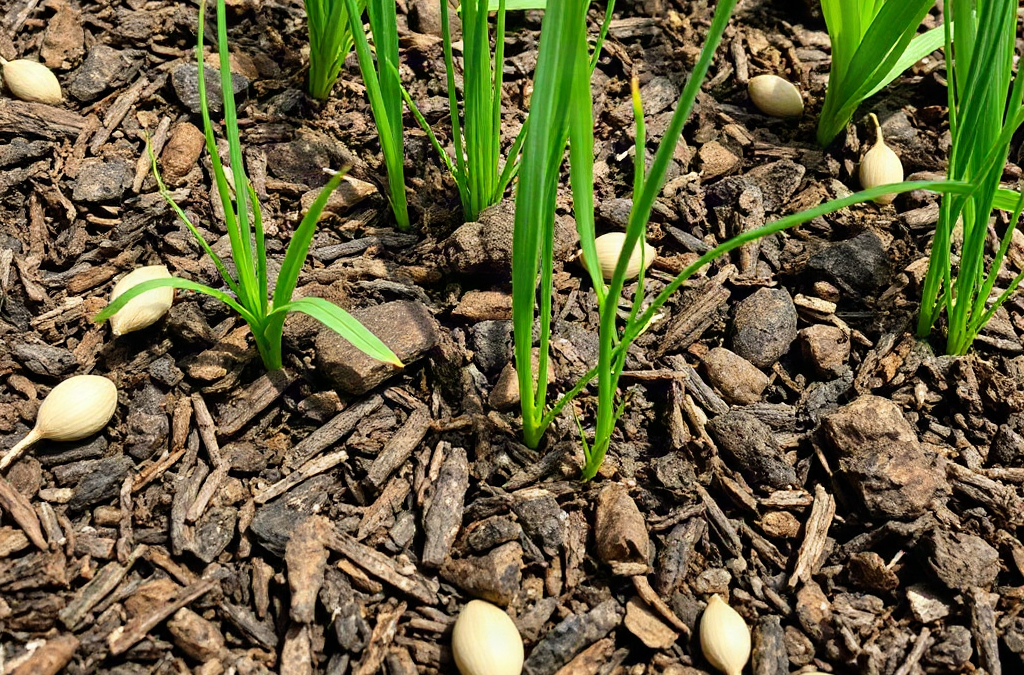
Weeds growing through mulch usually come from buried perennial roots, viable seeds already in the bed, or new seeds that germinate in decomposed material on the surface. Lasting fixes combine complete weed removal, correction of thin or disturbed areas, and a settled mulch layer about 2 to 4 inches deep, depending on the material and nearby plants. Landscape fabric may suppress some weeds temporarily, but it will not stop surface-germinating seeds and can complicate future maintenance. Pull or dig weeds before they set seed, replenish mulch where soil is exposed, and keep the material away from plant crowns and tree trunks.
Why Weeds Break Through a Mulched Bed
Mulch suppresses weed germination by blocking light and making the surface less favorable for seedlings, but it is not a permanent barrier. A layer that was effective when installed can become too thin after settling, decomposition, wind, runoff, animal activity, or repeated planting. Once light reaches exposed soil, dormant seeds may germinate. Even a narrow opening beside a perennial or along an edging strip can support a dense patch.
The origin of the weeds matters more than their apparent number. Annual weeds such as chickweed, crabgrass, and purslane commonly begin from seed. Some seeds were already in the soil before mulching; others arrive later by wind, water, birds, footwear, equipment, or contaminated material. Fresh wood chips do not normally create weeds, but fine organic debris that collects on top can eventually form a shallow germination layer. Seedlings growing in that loose surface are usually easy to pull while young.
Perennial weeds create a different problem. Bindweed, nutsedge, quackgrass, thistle, and similar persistent species can push shoots through several inches of loose material because stored energy in their underground roots, rhizomes, or tubers supports new growth. Covering visible foliage without removing or exhausting those structures often delays emergence rather than stopping it. Adding an excessively deep pile may also hold too much moisture around ornamentals without solving the underground infestation.
Installation shortcuts are another common cause. Spreading mulch directly over mature weeds leaves active crowns and roots in place. A very thin decorative coating may improve appearance while allowing ample light to reach the surface. Conversely, piling material against stems and trunks can encourage moisture-related damage while weeds continue to emerge elsewhere. Mulch must be deep enough to interrupt seedling growth yet placed with enough clearance to protect desirable plants.
A bed may therefore contain two weed populations at once: deeply rooted survivors emerging from below and newly germinated seedlings rooted in the top layer. Treating both populations as identical leads to repeated work. The practical priority is to inspect where each weed is anchored before adding more material. That distinction is central to diagnosing weeds growing through mulch: causes and lasting fixes rather than repeatedly hiding new growth.
Identify Whether Weeds Started Above or Below the Mulch
A gentle pull reveals much about the source. If a small weed lifts out with a short root and little resistance, it probably germinated in decomposing mulch or sediment near the surface. If the stem disappears through the mulch and remains firmly attached beneath it, the plant likely originated in the underlying soil. Move the material aside rather than pulling blindly; seeing the crown, taproot, rhizome, or shallow seedling root changes the appropriate response.
Distribution provides another clue. Scattered seedlings across the whole bed often indicate windblown seed or a favorable surface layer. A line of weeds at the bed edge may point to encroaching lawn, gaps in edging, or runoff carrying seed and soil inward. Repeated shoots in the same compact patch suggest surviving perennial structures. Weeds clustered around recent transplants may have emerged where planting disturbed the mulch and exposed soil.
Check depth at several locations with a ruler, including the center, edge, slopes, and spaces around plants. Organic mulch often looks substantial from above while measuring less than an inch after settling. Coarse bark or arborist chips typically maintain airflow at a greater depth than fine compost-like material. Fine mulch packed deeply can restrict water movement or remain persistently wet, so depth should be judged alongside texture rather than by a single universal number.
Use a short diagnostic checklist before choosing a fix:
- Trace the root: Determine whether it ends in the mulch, enters the soil, or connects to a spreading underground stem.
- Measure coverage: Find exposed areas and thin spots instead of assuming the original application depth remains.
- Inspect the edge: Look for turf runners, eroded soil, and seed-bearing weeds just outside the bed.
- Check plant clearance: Note mulch touching crowns, stems, bark, or low foliage.
- Review recent disturbance: Planting, digging, irrigation repairs, and animal activity can reopen the seedbed.
Do not assume that every green shoot proves the mulch has failed. A few surface-rooted seedlings after rain are normal maintenance in an organic bed and can be removed quickly. Failure is better indicated by widespread exposed soil, recurring perennial shoots, or repeated germination in the same neglected zones. The inspection tells you whether to weed, repair the layer, address an edge, or undertake deeper perennial control.
Remove Existing Weeds Without Spreading Them
Young annual weeds should be removed before flowering or seed formation. Pull them when the substrate is slightly moist, holding near the base so the root comes out rather than snapping. A hand cultivator can loosen surface-rooted seedlings, but vigorous cultivation may mix buried seeds into the germination zone. In a mulched ornamental bed, targeted hand removal usually disturbs less soil and preserves more coverage.
Move mulch aside before digging established weeds. For a taprooted plant, loosen the soil deeply enough to remove as much of the root as practical. For a rhizomatous weed, follow the underground stem carefully and avoid chopping it into many pieces. Some perennial species can regrow from fragments, so aggressive rotary cultivation may multiply the problem. Replace the mulch only after removing loose roots and leveling the disturbed surface.
Repeated cutting can weaken persistent weeds when complete excavation would damage nearby plant roots. Remove new shoots promptly and consistently so they cannot replenish underground reserves through photosynthesis. This approach demands patience; allowing shoots to remain leafy for long periods between cuts undermines the effort. Where an invasive perennial occupies most of a bed, temporarily lifting valuable plants and renovating the area may be more realistic than years of selective pulling.
Disposal also affects recurrence. Seed-free annual seedlings can often enter a well-managed compost system, but mature seed heads and vigorous rhizomes are riskier. Keep questionable material out of cool backyard compost piles unless the process reliably destroys viable seed and propagules. Bagging or using an accepted local yard-waste stream may be the safer option. Do not shake mature seeds back over the bed while carrying weeds away.
Sheet materials have limited but useful roles. Overlapping plain cardboard beneath fresh mulch can suppress a cleared patch of annual weeds and grass, provided the cardboard is free of plastic tape and does not block drainage around sensitive plants. It is less reliable against vigorous perennial weeds that can travel through seams or emerge at the perimeter. Permanent plastic is generally unsuitable in planted beds because it interferes with air and water movement, while landscape fabric eventually collects organic matter on top where new weeds root.
The common mistake is placing a new layer over standing growth. That hides the foliage briefly but leaves roots active and may make later extraction harder. Remove the plants first, correct the source, and then restore coverage. For a closer examination of recurring patterns, use weeds growing through mulch: causes and lasting fixes as a maintenance diagnosis rather than a reason to keep piling material higher.
Rebuild the Mulch Layer for Longer Control
An effective repair begins with an even, weed-free surface. Rake existing mulch aside, remove weeds, and fill minor depressions that collect sediment. Do not deeply turn the soil unless planting requires it; cultivation can bring dormant seed closer to light. Return usable mulch and add only enough fresh material to reach a suitable settled depth.
For many beds, roughly 2 to 4 inches of coarse organic material provides useful suppression. Coarse wood chips can often be used toward the deeper end because their irregular particles preserve pore space. Fine shredded products may mat and should generally be applied more cautiously. Around shallow-rooted perennials, small transplants, or poorly drained sites, a thinner layer may be safer. The goal is continuous light exclusion, not the deepest possible blanket.
Leave a small open ring around herbaceous crowns and several inches of breathing room around tree and shrub trunks. Mulch touching bark keeps the area damp and can conceal decay, rodents, or girdling roots. A volcano-shaped mound against a tree is not stronger weed control; it relocates the material away from the outer root zone and creates avoidable stress near the trunk. Spread it broadly and level it instead.
Material choice changes maintenance. Arborist wood chips and coarse bark tend to last longer and suit paths, shrub borders, and tree rings. Shredded mulch creates a more uniform appearance but may knit together or move on slopes. Straw can work around vegetables but may contain grain seed and breaks down relatively quickly. Finished compost enriches the surface but is not a strong standalone weed barrier because its fine texture can support seed germination. Combining compost as a thin amendment with a coarser cover is usually more effective than relying on compost alone.
Water the bed after installation to settle loose particles and reveal thin areas, then recheck depth. Watch how irrigation reaches the soil rather than assuming it passes through evenly. If water runs off a matted surface, loosen the crust and adjust application rate. If the layer remains saturated near plant crowns, pull it back. Success looks like even coverage, normal water infiltration, and occasional easy-to-pull seedlings—not absolute sterility.
Prevent the Next Flush of Weeds
Long-term control comes from interrupting seed production and repairing small failures early. Walk the bed every week or two during active growth and after soaking rain. A five-minute pass that removes seedlings with two or three leaves is more effective than a major cleanup after they flower, root deeply, or spread runners. Pay particular attention to bed edges, downspout outlets, bird-feeding areas, and spots disturbed during planting.
Control seed sources beyond the mulch. A neglected strip along a fence can continually replenish an otherwise clean border. Mow or pull weeds before seeds mature, clean soil from tools used in weedy areas, and avoid moving contaminated fill into finished beds. If lawn grass creeps inward, install or maintain a defined edge deep enough to intercept its runners. Edging does not stop airborne seed, but it makes vegetative invasion easier to see and remove.
Replenish according to measured loss rather than an annual calendar. Adding several inches every year without checking can create an overly deep layer, bury shallow plants, and alter drainage. Rake the surface, measure what remains, and top up only the deficit. On slopes, choose coarser material that interlocks reasonably well, improve runoff management, or use plants to stabilize the surface; repeatedly replacing mulch washed downhill does not address the cause.
Dense, healthy plantings can reduce open niches as they mature, although they should not be crowded beyond their space and airflow needs. Ground-covering perennials may shade the surface once established, while a mixed shrub border still benefits from mulch between plants. Living cover and loose mulch are complementary tools, not interchangeable ones. Plants compete for resources and require management; mulch suppresses light without adding root competition.
Herbicides are not the default answer for a few mulch weeds. Products differ in which plants they affect, where they may be applied, and whether they act on emerged weeds or germinating seeds. Misapplication can injure desirable plants or leave the underlying source unchanged. Anyone considering one should identify the weed, read and follow the current product label, and account for roots of nearby ornamentals. Mechanical removal and coverage repair are often enough for modest infestations.
A useful maintenance record can be as simple as noting where weeds recur, when mulch was last added, and whether shoots return after removal. Recurrence in one place points toward surviving roots or an edge breach; new seedlings across the surface point toward incoming seed and decomposed material. That evidence makes the next intervention more precise and prevents the cycle of indiscriminate top-ups described in weeds growing through mulch: causes and lasting fixes.
Frequently Asked Questions
Why do weeds grow through new mulch?
Existing roots may survive below it, buried seeds may germinate where coverage is thin, or fresh seeds may land on top. New mulch suppresses germination but does not kill every established perennial root.
Should I remove old mulch before adding more?
Usually not. Rake it loose, measure the remaining depth, remove weeds, and add only enough to restore even coverage. Remove material only if it is contaminated, badly matted, or excessively deep.
Will landscape fabric stop weeds permanently?
No. It may suppress weeds rising from below for a time, but soil and organic debris accumulate above it, allowing new seeds to germinate. Persistent roots can also exploit seams and planting holes.
How deep should mulch be to control weeds?
About 2 to 4 inches suits many coarse organic mulches, but texture, drainage, slope, and plant type matter. Use less around sensitive crowns and keep all mulch away from trunks and stems.
Can I put cardboard under mulch?
Plain overlapping cardboard can help suppress cleared annual weeds or turf during bed establishment. Remove tape, wet it after placement, and do not expect it to contain aggressive perennial roots indefinitely.
Conclusion
Persistent weeds call for diagnosis before another bag of mulch is opened. Trace their roots, measure coverage in several places, and inspect disturbed areas and bed edges. Surface seedlings need prompt removal and restored coverage; deep perennial growth requires careful digging or repeated depletion of its underground reserves. After clearing the bed, spread an appropriate coarse material evenly, maintain safe space around crowns and trunks, and confirm that irrigation still reaches the root zone. Recheck the bed after rain and during peak growth so small seedlings never become seed sources. A maintained 2- to 4-inch layer can greatly reduce routine weeding, but the durable result comes from combining that barrier with clean edges, timely removal, and measured replenishment rather than treating mulch as a permanent seal.


